Carry Awards
 Insights
 Liking
 Projects
 Interviews
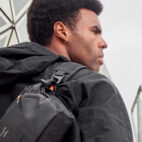
Packing 101: How to Pack for a Backpacking Trip
After all the times I’ve said “different strokes for different folks,” and “hike your own hike,” there is, believe it or not, a correct and incorrect way to pack your bag for a backpacking trip. I guide 22-day wilderness expeditions that include a 10-day backpacking segment, and teaching folks how to pack a backpack for a backpacking trip is one of the more difficult parts of the job. Organizing your equipment efficiently in a three-dimensional space can be tricky, especially if you aren’t an experienced backpacker. So before we really get into it, there are a few general things to consider up front.
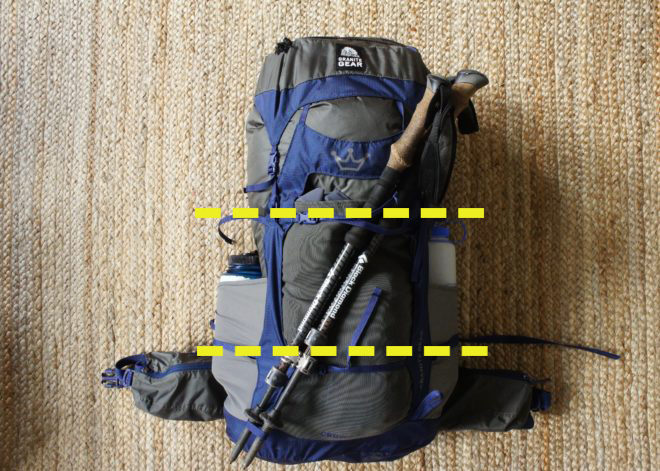
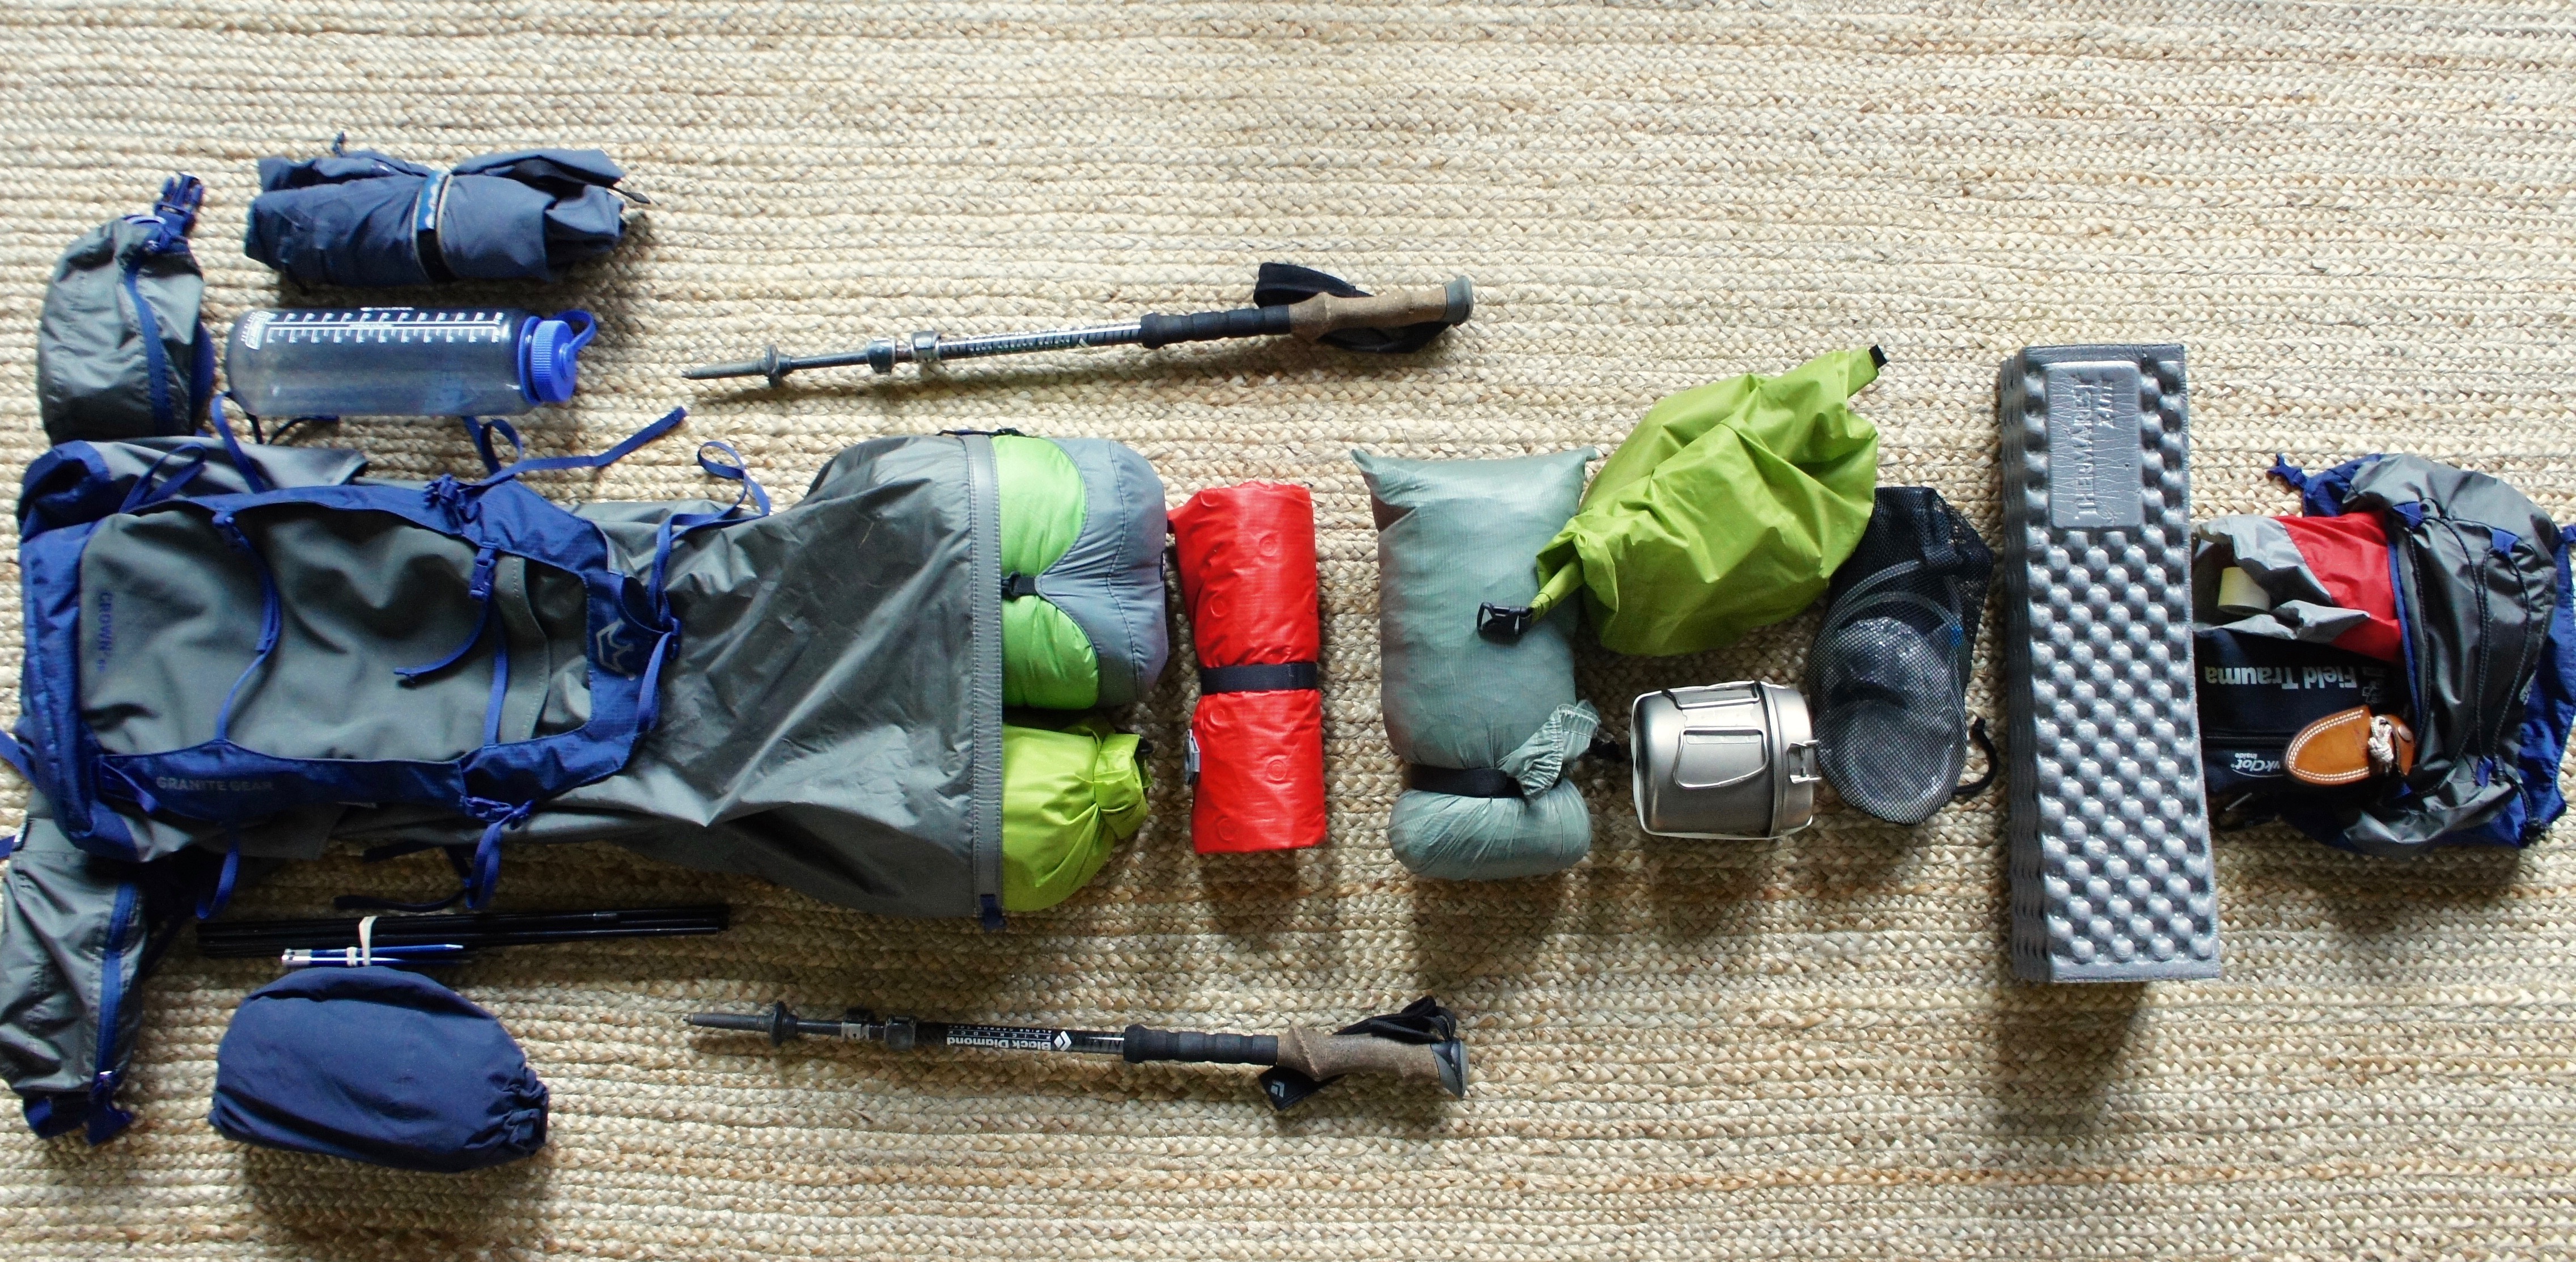
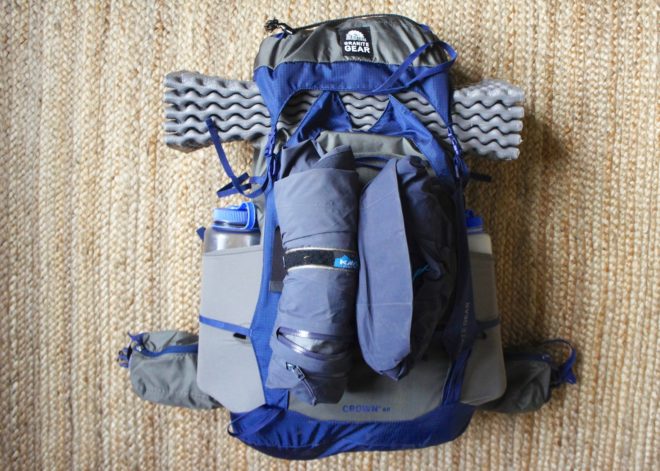
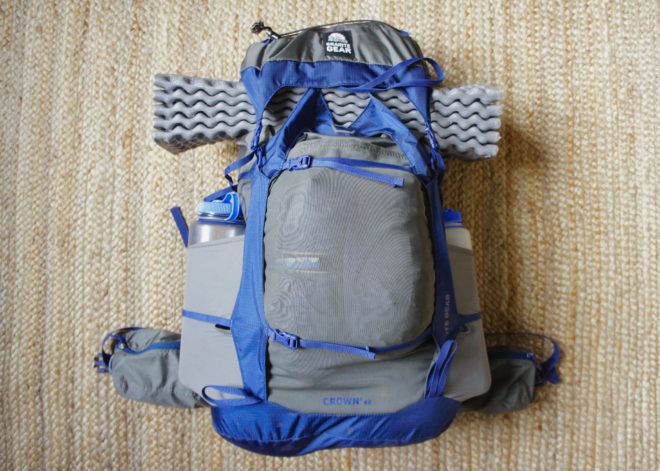
Think of the pack separated into thirds by the horizontal compression straps. The base, the center, and the top are the three sections of the bag that you’ll need to focus on packing.
First, you want to keep the heavier items as close as you can to your center of mass. That means don’t strap your tent to the bottom of your pack. That’s too much weight too far away from your center of mass. Seriously, you’re doing it wrong. If you need to strap a tent to the outside of your pack, run it between the lid and the main compartment.
Second, the more you can compartmentalize, the better. You’ll see me use compression bags and dry bags for most of my gear. This helps with organization, compression, and waterproofing. I have a dry bag of every size for every category of gear I’m packing.
Now onto the nitty-gritty. When we look at the profile of the pack, it’s easiest to think of it in three vertical sections: the base, center, and top. In the picture below, it’s easiest to visualize the compression straps separating the bag in thirds.
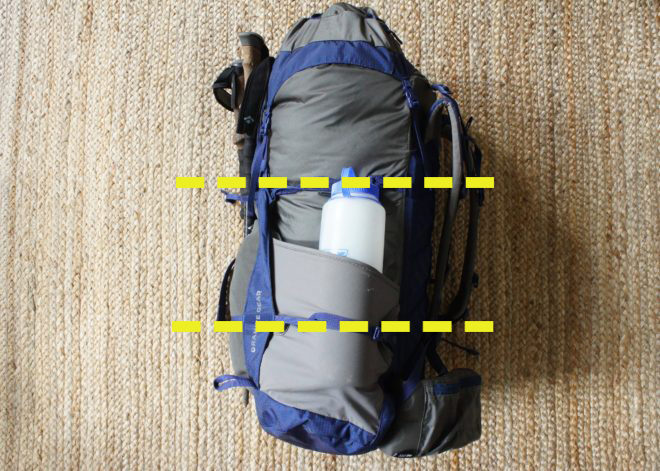
The horizontal compression straps are a good point of reference for breaking the pack into sections on this Granite Gear Crown 2.
The Base
The base of the pack is a good spot for your sleeping system and any additional clothing that you’re packing but won’t be wearing anytime soon. I personally keep these separated into two dry bags: one for the sleep system, and one for additional clothing. My inflatable sleeping pad lives in the bottom section with the rest of my sleep stuff and fits neatly on top of the two dry bags.
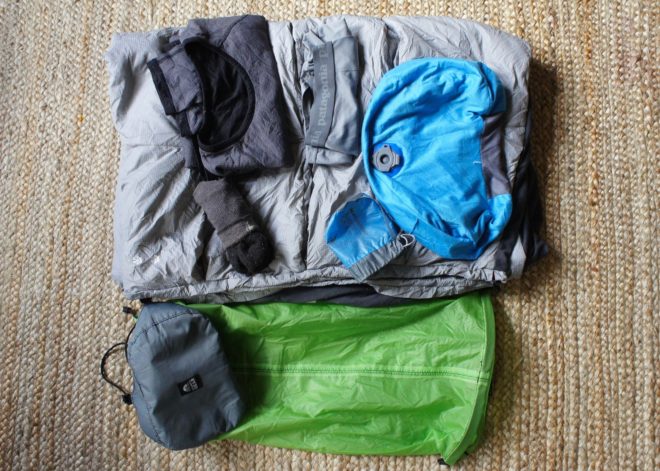
I consider my sacred socks, a clean pair of underwear, and a wool shirt as part of my sleeping system. I keep these clothes and a pillow with my sleeping bag at all times and store the whole package in a Granite Gear eVent Sil compression dry sack.
My sleeping system stuff stack holds my sleeping bag, my sacred socks, a clean pair of underwear or thermals depending on the weather, and my medium weight insulation layer. During summer, that’s probably no more than a fresh wool long sleeve. On colder outings it’s either a down jacket or a synthetic layer. The socks and underwear never leave this bag. They’re part of the sleep system. Count them in your spare clothing totals, but don’t wear them outside of the sleeping bag.
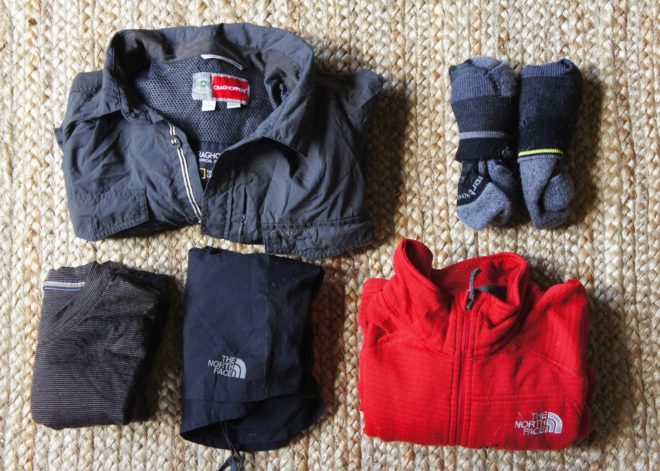
A basic array of extra clothes for me includes a lightweight fleece, a long sleeve button up, an extra wool t-shirt, a pair of running shorts, and two pairs of socks. Including the clothes on my person, I can comfortably use this setup for upward of 2 weeks in fair weather.
My extra clothes are dictated by the weather and duration of my trip. An extra pair of socks for every week I’m out, an extra wool shirt, a long sleeve button up, shorts with brief liners sewn in, and a fleece is about all I need in summer weather.
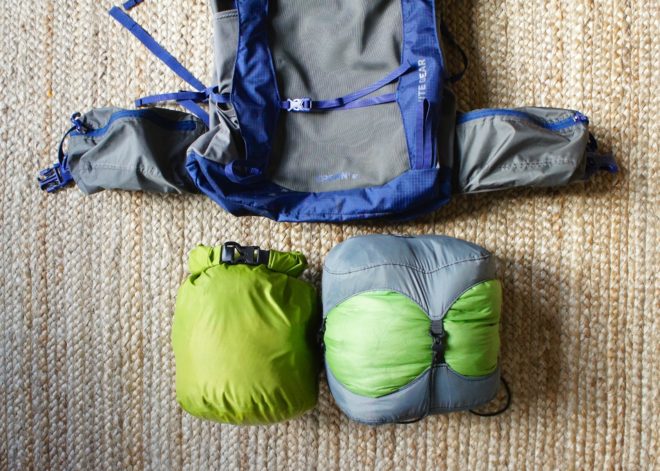
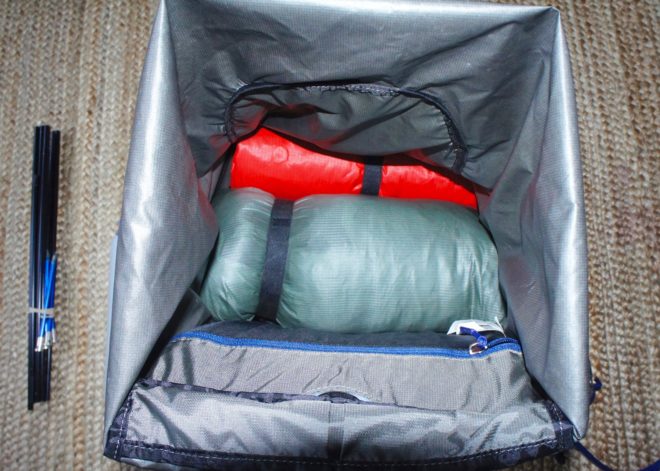
My extra clothes are in the dry bag on the left and my sleep system is in the compression sack on the right. These make up the base section of my pack and keep heavier items higher up in the main pack bag and closer to my center of mass.
“The socks and underwear never leave this bag. They’re part of the sleep system. Count them in your spare clothing totals, but don’t wear them outside of the sleeping bag.”
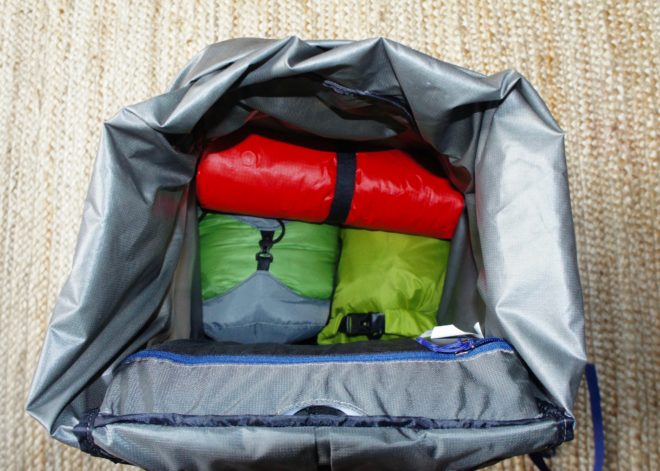
A first-person view of my bag with a packed base section. The sleeping pad gets rolled up and pushed to the front face of the main pack bag so that heavier items can be placed closer to the back.
The Center
Now that we have that cushy base section filled, we can lay down our hard goods. Your cook kit, fuel, food bag/canister, and any other dense items should go here in the center of the pack, with the heaviest items as close to your back as possible.
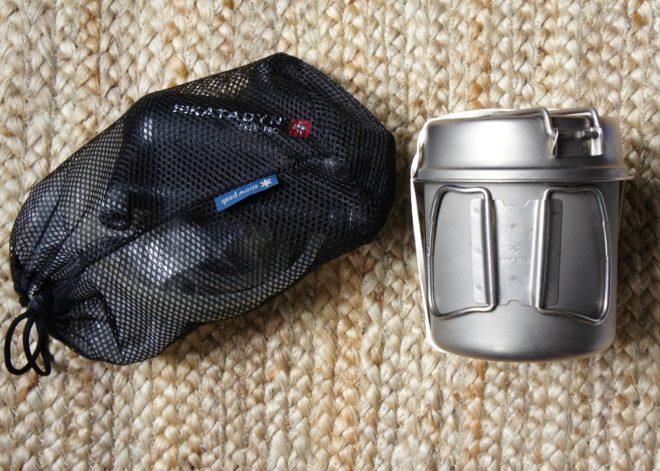
Water and food. The Katadyn Hiker Pro has proven itself reliable in all manner of conditions and the Snow Peak Trek 900 gives me plenty of space to nest a 110-gram fuel canister and a Jet Boil Mighty Mo.
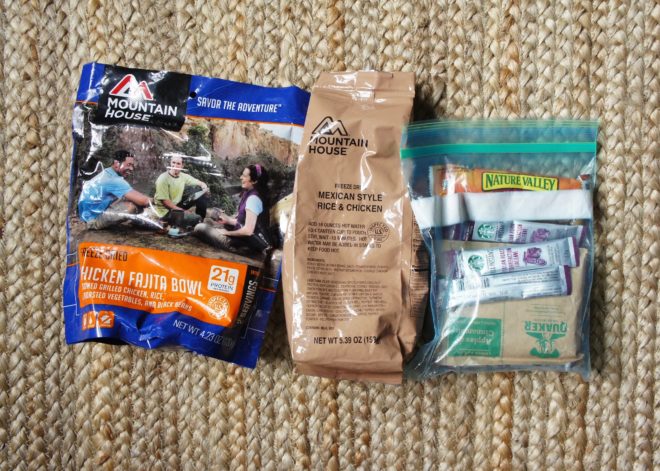
This is a generalization of what I’d eat on a weekend trip. I’ll need to fix myself some PB&Js before heading out, but I like the simplicity of the freeze dried meals from Mountain House for impromptu adventures.

I keep my food in yet another dry bag that’ll get tossed as a bear bag before turning in for the night. A dry bag is an easy solution for food storage in most environments where bear canisters are not required.
Your shelter will also go in the center. If you’re carrying a traditional backpacking tent, I recommend running your tent poles through the compression straps and down the side of the pack. This also changes up the standard 18×5” sack that tents are stored in and makes for easier packing and better weight distribution.

Removing any poles from your structure decreases the length of your shelter package and makes packing a lot easier. I like to run the poles between the compression straps and into the side pockets when I do take traditional pole-supported shelters.
On shorter trips, I sometimes use my inflatable sleeping pad as a collar rather than a roll (as pictured) to keep these items pinched toward my body. Just remember that the closer the weight of the bag is to your center of mass, the better it will ride.
Tents are among the heavier, denser items that you’ll pack. Carry them as close to your back as possible in the center section of the bag.
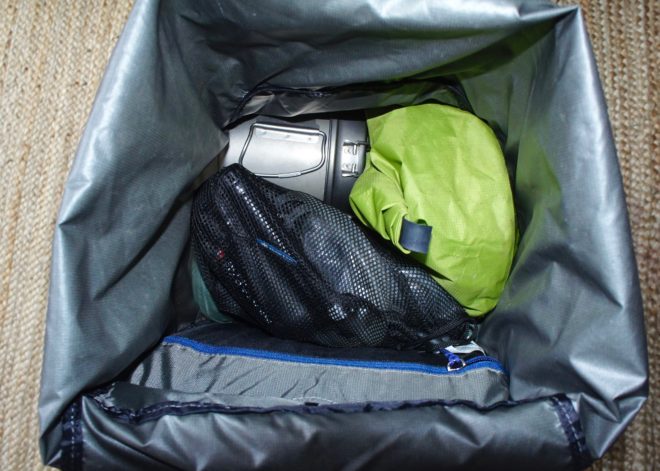
Food is also very heavy and very dense. Make sure you pack it in the center section of the pack. My cook kit and water treatment also find their home here in the center section.
“Straps and plastic bags are the currency of wilderness living. Compress gear. Lash things. Keep stuff dry. Organize your bits and bobs. If you had to take extra something, it had better be Ziplocs and Velcro.”
The Top
Up top we’ll stick all our fast-access items like your rain gear, first aid, and insulation. This is really the hodge podge section where anything that doesn’t find a suitable home in a pocket winds up. For me, this top section’s contents are dictated by what bag I’m carrying. For example, with the Stein 62, I’m carrying my rain gear in the large front face pocket. If I’m using the Crown 2, I’m sticking my rain gear in the large stretch woven front face pocket. If I’m carrying the Flex Capacitor, my rain gear is right up top.
Where I keep my rain gear really depends on what bag I’m using. In this Crown 2, I like to keep it at the ready in the stretch woven front face pocket.
Personal preference comes into play here a little for the lighter, smaller odds and ends. I like to keep a snack within arm’s reach, I carry TP in a small plastic bag in the uppermost pocket of my pack, and I typically keep my compass and map on my person in a chest pocket.
At this point, you should have your big items packed. This is a good time to go through the ten essentials and pack anything on that list that you haven’t already. For those keeping score, it should look something like this:
- Navigation
- Protection: Sun + Bug + chap stick
- Clothing (insulator)
- Illumination
- First aid
- Fire kit
- Food
- Water
- Shelter
- Knife+tool
On Person and In Pocket
Like I said, I like to keep my navigation on my person, but in this case, it’s going in the lid of the pack, so we can cross that off. Next is protection, illumination, and fire. Before I move on, I should say redundancy is crucial for things like illumination and fire, especially when traveling with groups that I am responsible for. I take a backup headlamp (and a third in the first aid kit) and an extra lighter (also in the first aid kit). I typically keep these smaller items in an “essentials stuff sack”. For me that’s a silnylon drawstring sack that came with a sleeping pad that I keep in the lid of my pack. If the pack doesn’t have a lid, then obviously this little ditty bag is going to end up in the uppermost section of the main pack bag. That leaves me with Water and Knife + Tool left to cover.
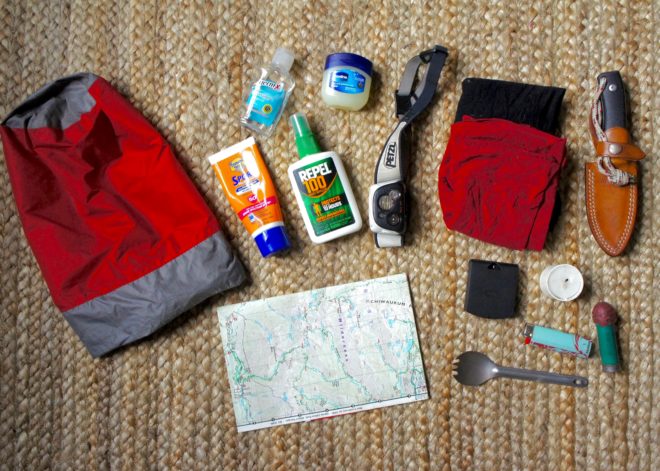
Smaller “essential” items do well together in a waterproof sack. I’d traditionally keep my map and compass on my person, but for the sake of this piece, they’ll be stored in the lid along with the rest of this gear.
Where your water treatment system goes will depend largely on what your primary method is. For me, I’m turned big onto iodine right now after leading groups of 6-8 people out in the backcountry for three weeks at a time. I think iodine is a real winner. So that’s either in a tiny baggie in a top pocket or in my Pelican 1020 which is currently acting as a fire/water kit. As for knife and tool, I carry a small fixed blade around my neck and a larger fixed blade in the uppermost section of my pack or on my hip belt if I’m able. I’ll also carry a Leatherman One Hand Tool, which has recently quit One Hand-ing, in the first aid kit along with my sleeping mat patches and duct tape.
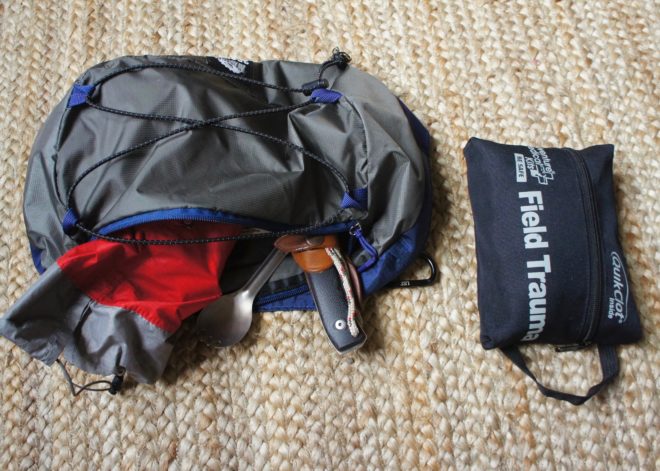
With room to spare, the lid of this Crown 2 will swallow a small first aid kit, a map, my essentials sack, a spork, and a Lion Steel M4.
On the outside of the pack, I’ll stash my poles when I’m not using them. I use a tarp or a tent that uses trekking poles as structural support, so I typically bring them with me. Lastly, I never go anywhere without my Therm-A-Rest Z Lite. More on that in the future, but those who know take one with them everywhere.
Last but not least, the Therm-A-Rest Z Lite lives between the lid and the main pack bag. I never leave home without it.
Pro Tips
Straps and plastic bags are the currency of wilderness living. Compress gear. Lash things. Keep stuff dry. Organize your bits and bobs. If you had to take extra something, it had better be Ziplocs and Velcro.
If you’re going to be out for a long time, I’d take a trash compactor bag as a bag liner. If you’re only out for a few days and the weather looks clear, you’ll probably be fine. Trash compactor bags only weigh a few grams and are worth the weight to reward ratio. Obviously, it gives me a waterproof liner for critical items like my sleeping bag, but it also gives me another item to sit on, collect trash, wash clothes, gather water, etc.
The primary focus of this piece was on organizing the ten essentials and weight distribution. Things like your personal items and hygiene are going to be packed at your own need and discretion. How do you pack your bag differently? Have you discovered any packing hacks that the rest of our carry community would really benefit from? Comment below with tips and tricks of your own and add to the conversation.