Carry Awards
 Insights
 Liking
 Projects
 Interviews
Insights
“Be careful what you wish for because it might come true” is something I regularly say to myself.
Having read and dreamt about polar expeditions since I was in my early teens, I still can’t believe that I’m actually living my dreams. But following your passion comes at a cost. Planning and organizing big expeditions can seem more like brinkmanship than anything else—especially when the logistics costs are exponentially high and chances of success are even lower.
Making a living at a sport that exists not only on the periphery of sport but also the realm of human conciseness is challenging at best. Still, after 30 years of pushing the limits of cold-weather adventure, I’ve been able to channel all that knowledge and experience into a meaningful career. Being a polar expedition guide that allows me to travel in the places I love and help others achieve difficult objectives in extreme environments.
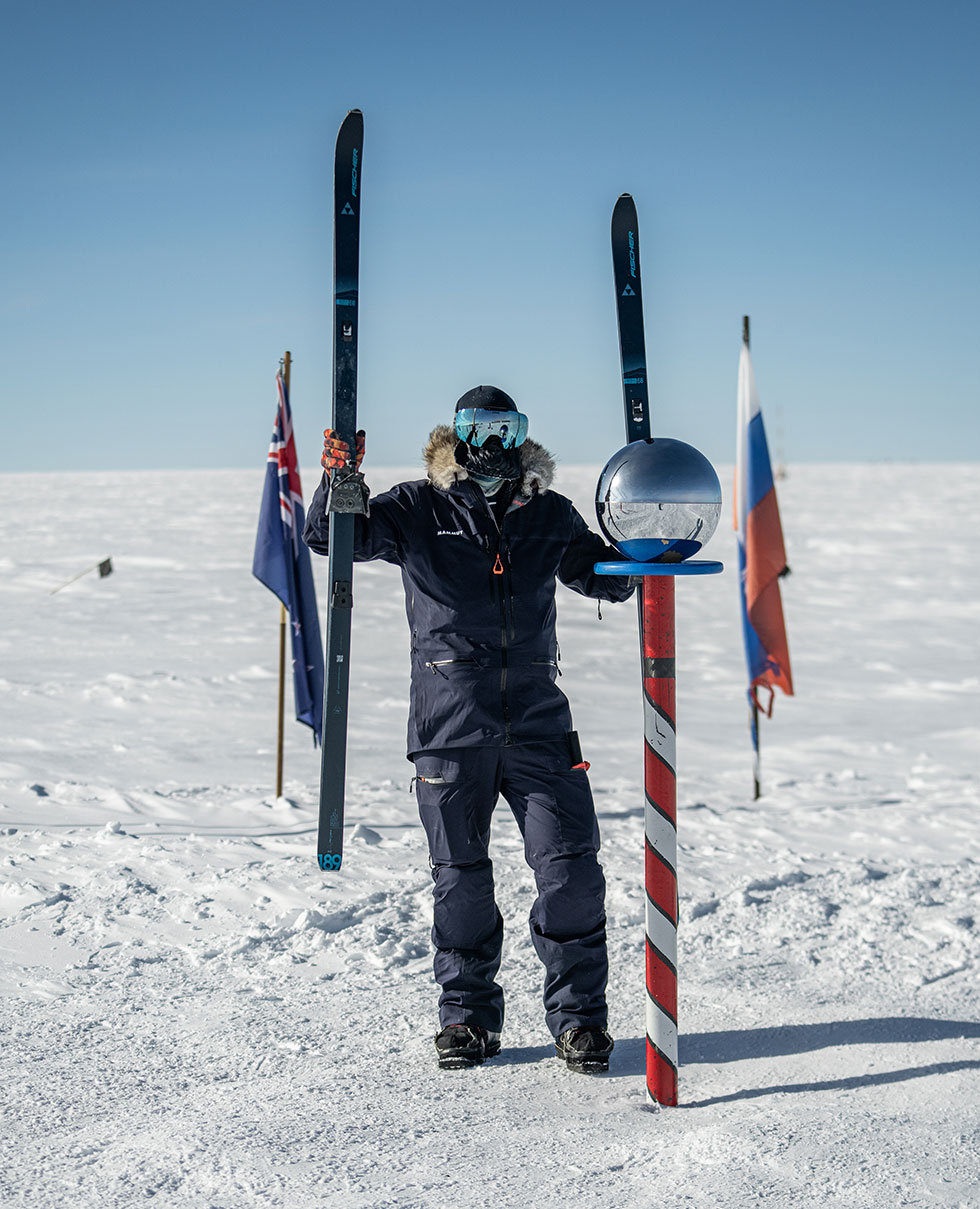
Enter Antarctica. The coldest, windiest, and driest place on our planet. Even in its most benign moments, it’s extreme. Traveling on human-powered expeditions there requires a comprehensive understanding of endurance, nutrition, navigation, cold-weather clothing and equipment, and much more. As a guide, keeping clients safe where margins are extremely thin requires a whole other equation.
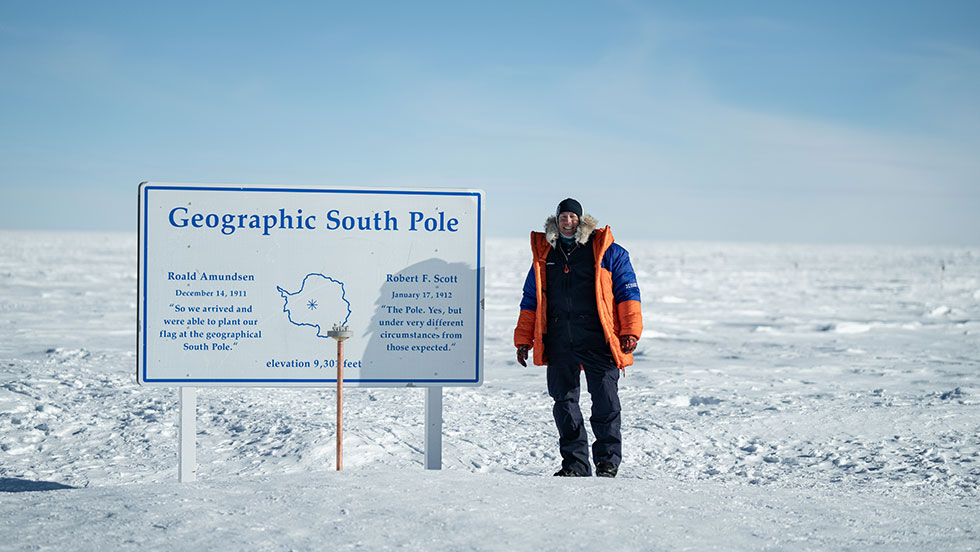
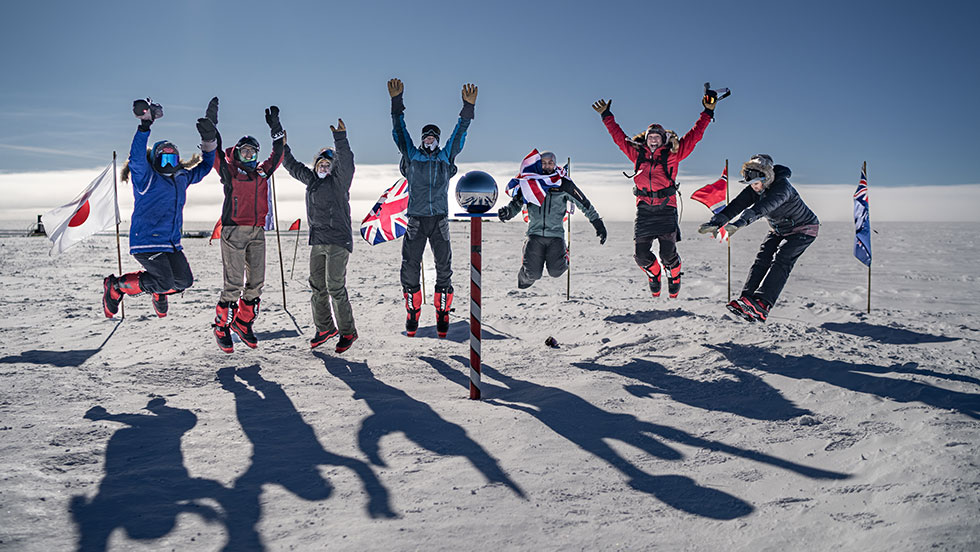
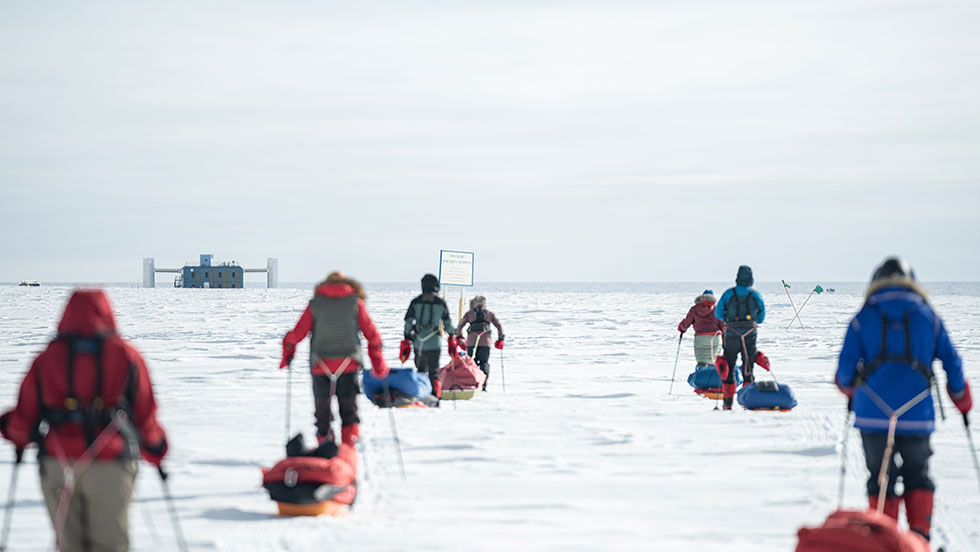
While expeditions in Antarctica originally started as pure exploration with Scott and Amundsen racing to be first to the South Pole, in more recent times, adventuring there has evolved in many ways. Regardless, the history and stories of this remote place continue to capture people’s imagination, and for the focused few, there is an opportunity to complete what Shackleton never did: stand on the South Pole. With enough money, you can fly there just for a champagne toast. But for those looking for bigger challenges, skiing to the Geographic South Pole provides the best way to walk (but really ski) in the footsteps of the polar greats.
Modern polar expeditions, though heavily supported (at times) and connected (via satellite communications) by technology, still involve the same strategies and style of 100 years ago. With broad strokes, the plan is relatively simple: fly to Antarctica, land on a ‘blue ice runway’, spend a few days preparing and packing at a comfortable base camp replete with showers, dining tents and more, then another flight by twin otter or DC 3 to your starting point—whether it be at the edge of the continent for a ‘full’ expedition or somewhere closer to the pole for a partial or ‘Last Degree’ adventure which entails skiing the last degree of latitude to the pole—from the 89th parallel to the 90th, a distance of nearly 70 miles.


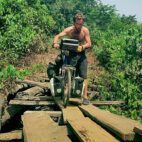
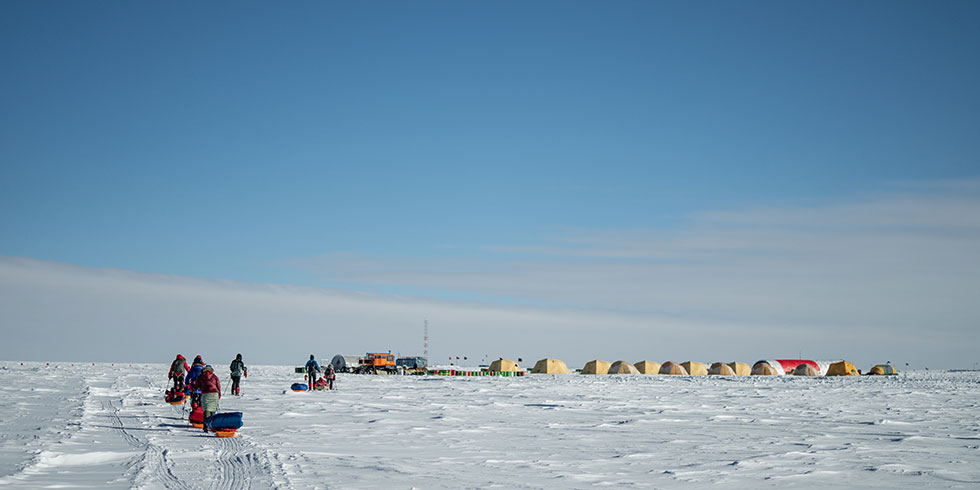
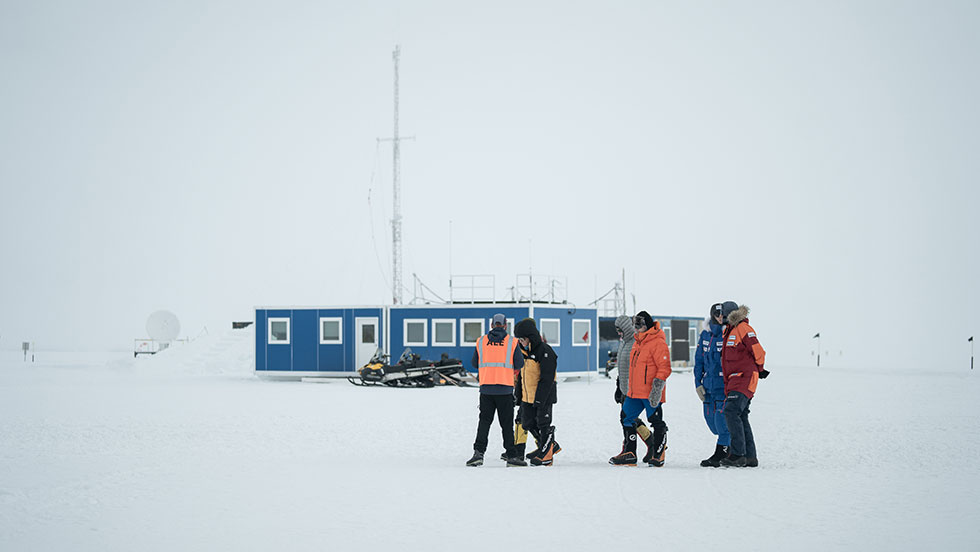
Having traveled to Antarctica for my own adventures over the years, this year my trip would be as a polar guide working for Antarctic Logistics and Expeditions (ALE). With a temporary base constructed at Union Glacier, ALE supports a variety of adventurers, polar tourists, and scientists throughout the Antarctic summer season, which spans roughly from November through the end of January every year. At the end of the season, the camp is dismantled and packed away. This year, I would be guiding two Last Degree trips.

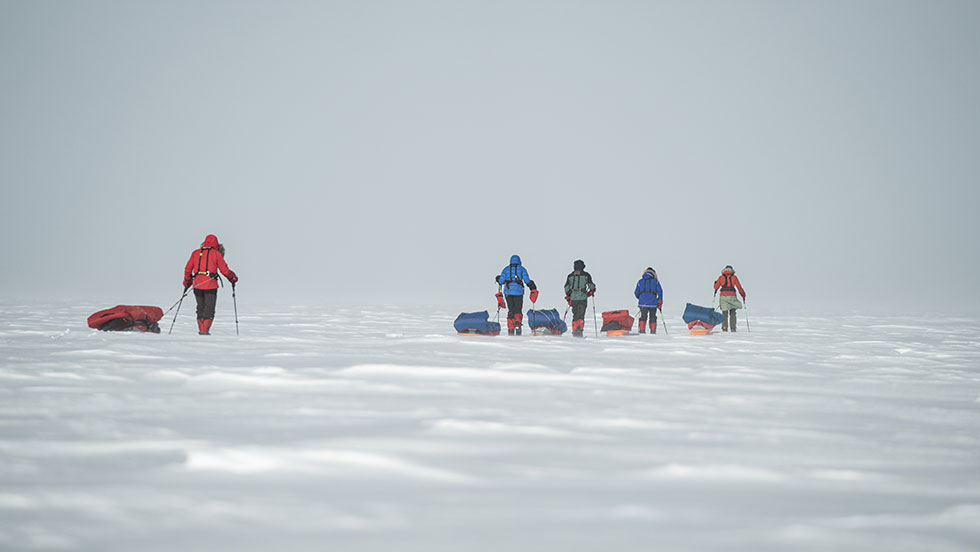
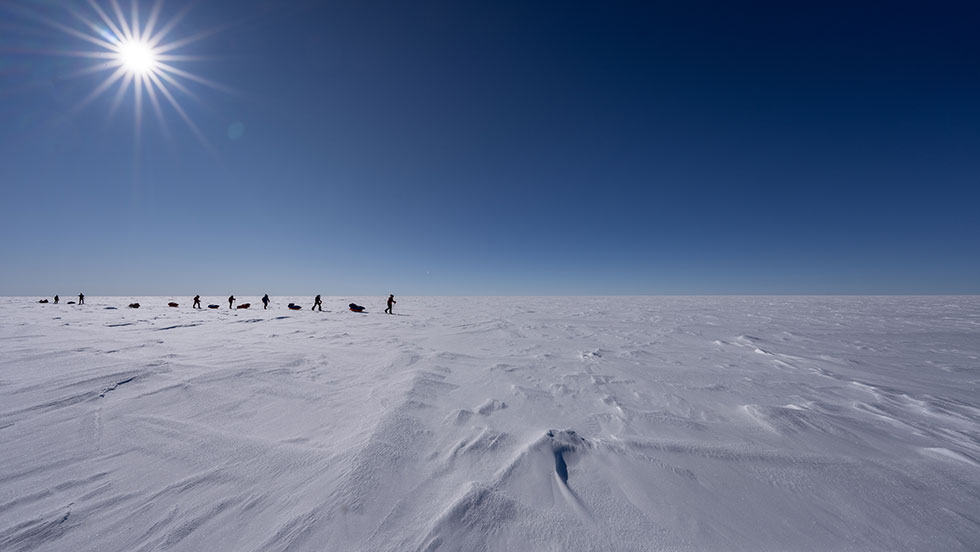
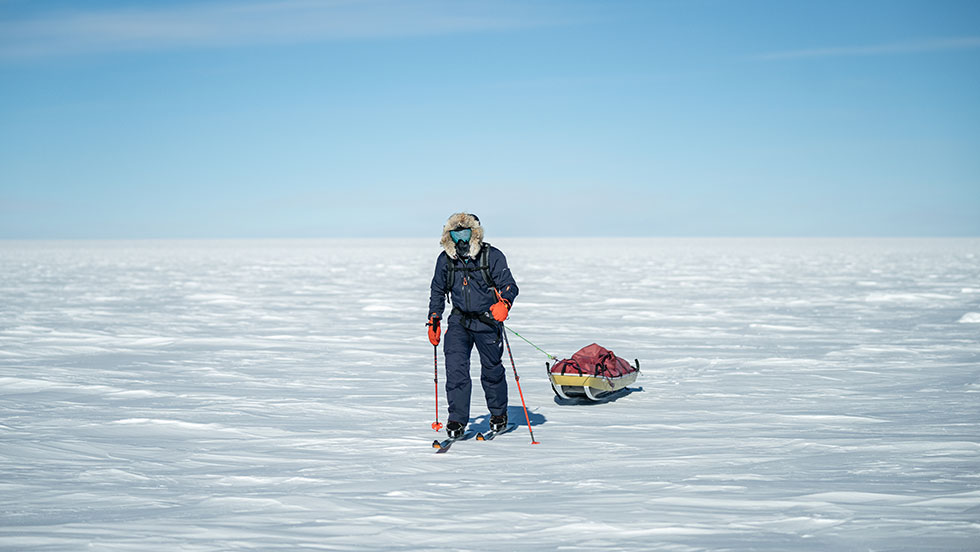
Skiing to 90 South, however, is not easy, no matter how you slice it. Traveling across a wind-sculpted snow surface that stretches on for hundreds of miles in every direction is both overwhelming and mind-numbing. On a good day, you can see a never-reachable horizon line in the distance. On bad days, there is no line or really anything else. Overcast skies create mind-numbing whiteouts that can only be described as the inside of a ping pong ball. In these conditions, it’s nearly impossible to ski in a straight line and equally as difficult to simply keep your balance upright. Elevation is a challenge too, as the hundreds of square miles around the South Pole are positioned atop the polar plateau and elevation that reaches above 8,000 feet (9,300 feet at the South Pole) but feels more like 11 or 12,000 feet to your body because the earth’s atmosphere is thinner at the poles. And did I mention the temperature? All this is happening at temperatures of -10 to -30 with even colder windchills. Having any exposed skin in these conditions means frostbite in a matter of minutes. Needless to say, the consequences for disaster are high and the margins for safety are low.
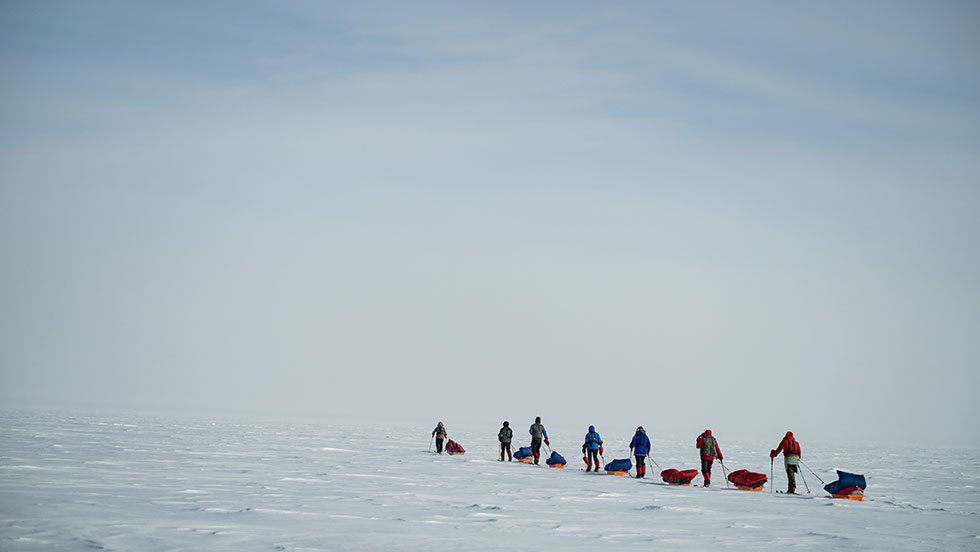
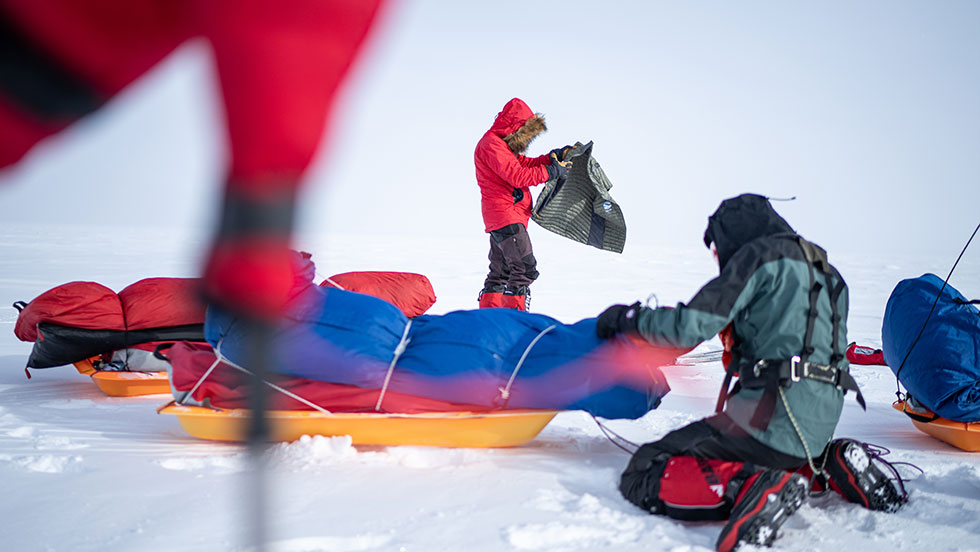
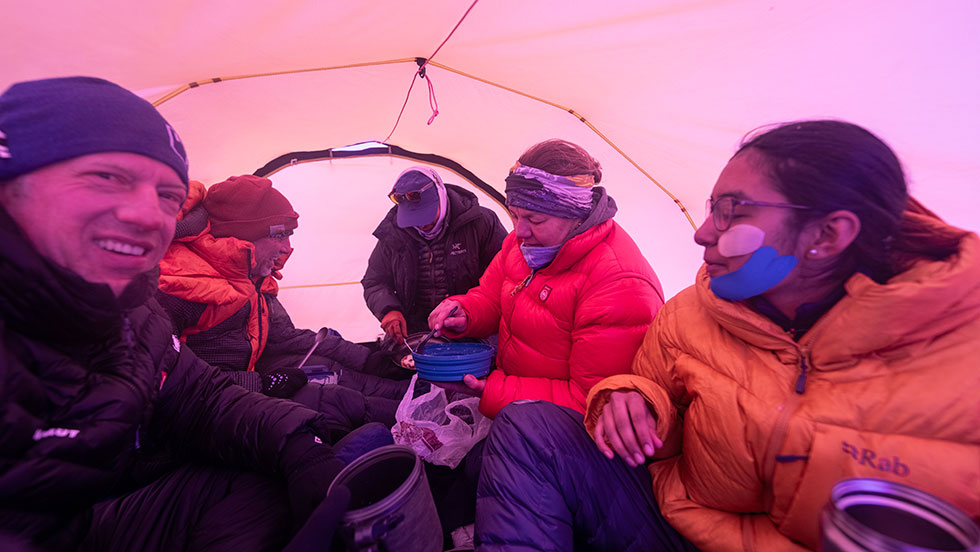
Of course, these are also self-supported adventures. That means everything that we need to live and survive is carried with us, pulled in small lightweight sleds called pulks. Food, fuel, clothing, tents, sleeping bags, repair kits, wag bags (and the you-know-what that goes in wag bags).
If there is one thing that the lightweight backpacking and hiking revolution has taught us, it’s that less weight equals easier and faster travel. However, in Antarctica, where extreme cold can make nylon tear like a sheet of paper or a tent pole snap like a dry twig, having gear that can withstand low temperatures, intense solar exposure (it’s 24-hour daylight), and intense regular usage is paramount.
One of my many polar tenets: Light isn’t always right… but weight matters. Everything that we do is first looked at through the lens of functionality and durability: can each item be used effectively, efficiently, and repetitively in harsh conditions? From base layers to boots, goggles to gloves (but really mittens), skis to sleeping pads.
Luckily, our focus is singular, which makes gear planning slightly easier because we know both the objective (the South Pole) and the style in which we’re traveling (self-supported skiing). But the lack of easy rescue means the exact gear we pack for Antarctica and how much of it is very, very important.
When working with clients on trips like this, I like to explain not only the ‘what’ but also the ‘how’ and ‘why’. Not all cold-weather environments are created equal, and polar travel poses unique challenges that simple winter camping or even mountaineering don’t have. Skiing to the South Pole and climbing Mt. Everest may be similar in their extreme nature, but the environments and travel strategies couldn’t be more different.
Skiing
Skis: Fischer Traverse 78 Crown Xtralite w/ skins – Love these skis. Metal edge wood core. Wide enough to be stable on the uneven, soft, and hard Antarctic surface but also narrow enough not to be cumbersome and heavy. A sturdy core that holds the bindings nicely and a full metal edge. I’ve never had any issues with these skis! I also use 3/4 length 35 mm ski skins that I screw into the base to help with traction on the snow while pulling heavy loads.
Bindings: Voile – Basic and durable. Although there are some more modern styles of binding (NNN BC), these ‘three-pin’ bindings are simple and easy to use. I can close/open the bail with my ski pole tip so I never have to bend over to get my skis on or off. I’ve never had one fail in 30 years—although when I guide, I bring a spare pair.
Poles: One Way BC Vario – for bigger expeditions, I don’t like having a sectional pole as there is more potential for breakage, but I’ve been using these One Way poles for several years now and love them. They have a larger hand loop to accommodate mittens and a padded foam grip below the main grip (so I can position my hands lower and keep them warm). I also like the baskets on these as they are big enough (but not too big) to support the pole in soft snow while also being flexible (and also durably riveted) so that when you move forward, you’re not fighting the hard snow with the basket.

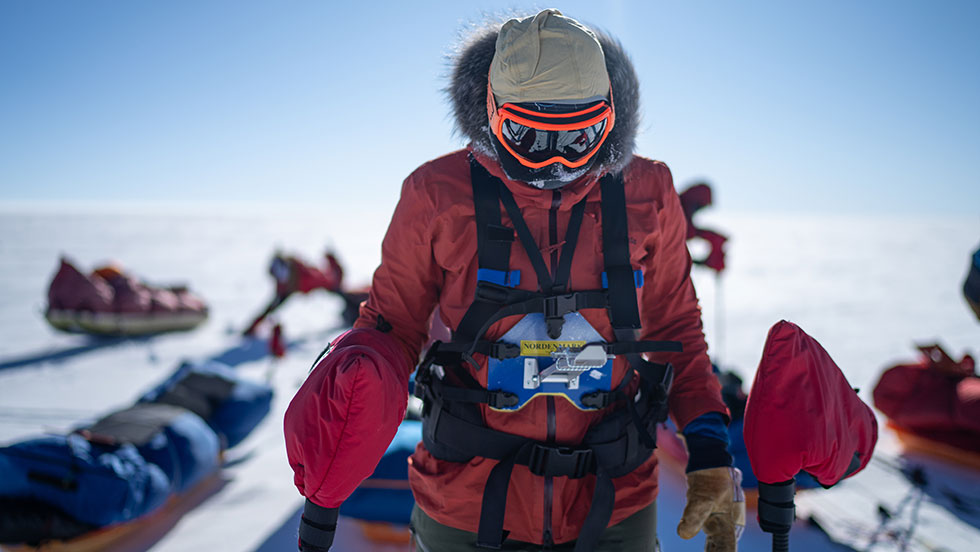
Harness: Granite Gear – another custom product that is no longer made, this is the best sled pulling harness that has ever existed – full stop. With separated side hips and lightly padded shoulder straps, this harness fits exactly like a backpack and allows you to pull weight with your hips (bones). The shoulder straps, while not as necessary in Antarctica, prevent any slippage in the harness and provide a snug and comfortable fit.

Boots: Baffin 3PIN GUIDE PRO Boots. While not pictured, I use these boots as much as I can. Super warm. Super comfortable. They’ve gone through a few iterations over the years but, again, I like the simplicity and ease of use with the Voile three-pin binding.

Clothing
Base Layers: Mammut Aenergy – Surprisingly at 20 degrees below zero in Antarctica, I’m more worried about getting too warm than too cold. Therefore, my main ‘action suit’ or the clothing I travel in consists of very light base layers and a shell. I stay away from anything thicker as moisture doesn’t travel as well through anything thicker than that (making you colder in the long run as staying dry in the cold is paramount). Personally, I like to have a synthetic layer next to my skin as I feel it wicks moisture better than wool.
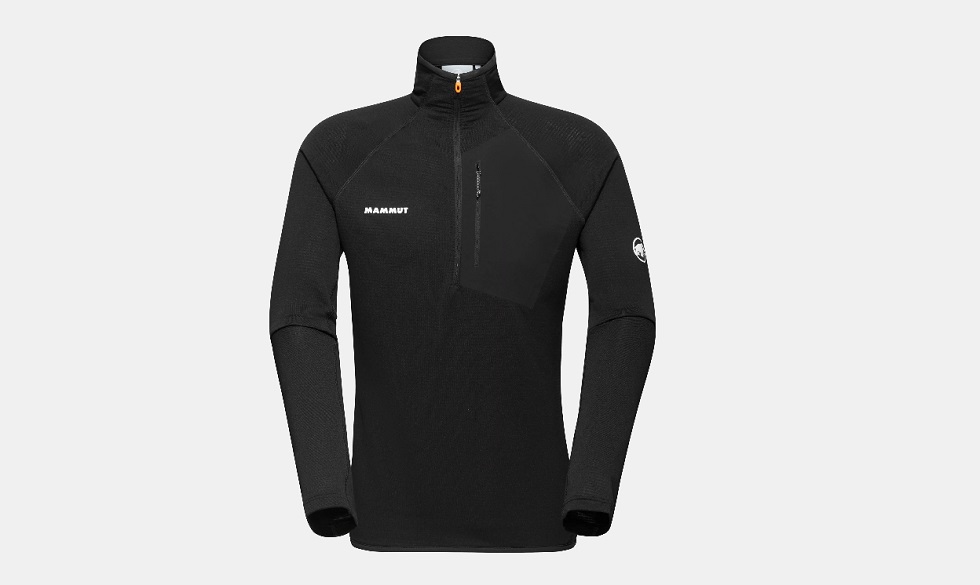
Fleece: Mammut Taiss Light ML – This is a light fleece layer that I like to wear in the tent as an additional layer of warmth or on extremely cold days. If the latter, I’ll wear it over my shell bibs so that I can easily take it off if I overheat.
Down Sweater / Jacket: Mammut Albula IN Jacket – this is just a comfort layer that I wear in the tent while cooking and hanging out. It’s just a basic puffy but I like one without a hood so it doesn’t brush up against the tent wall.
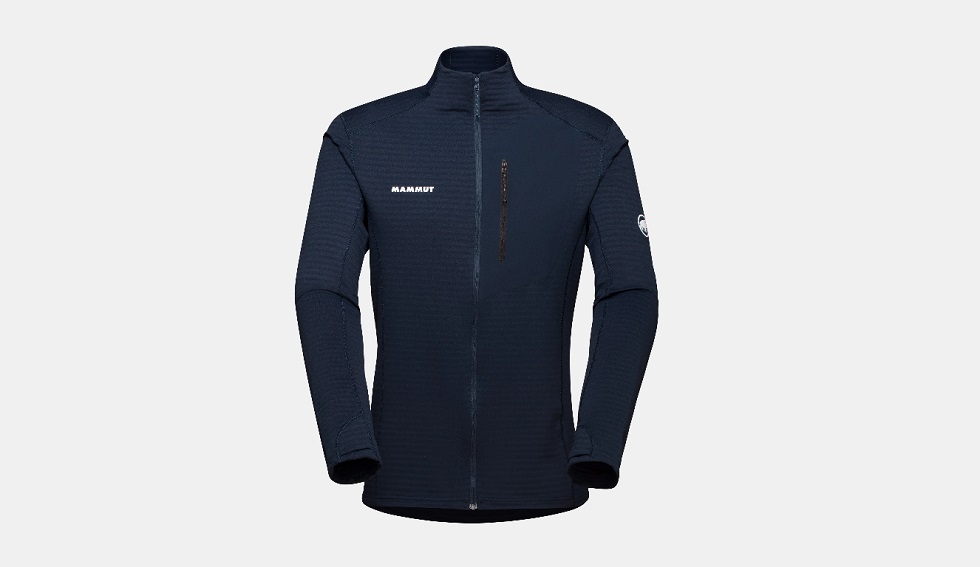
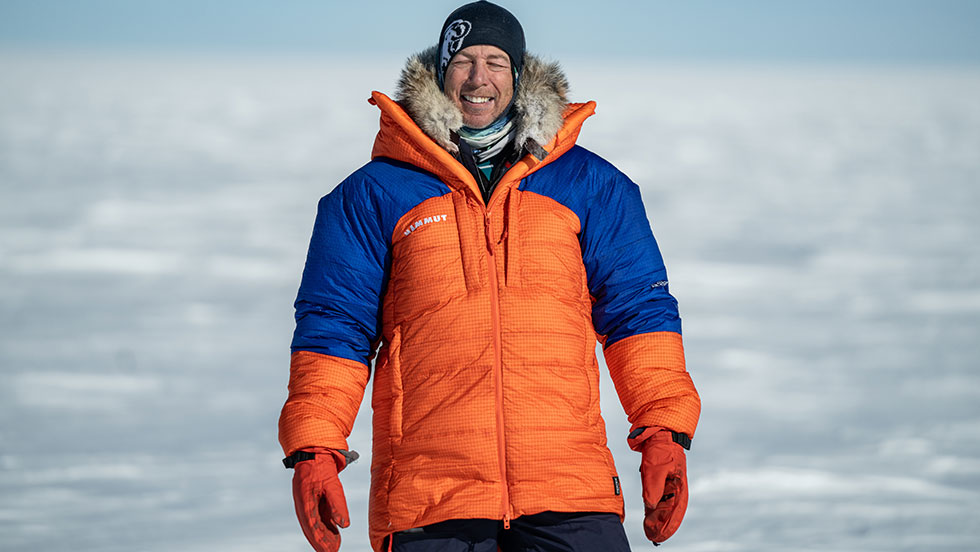
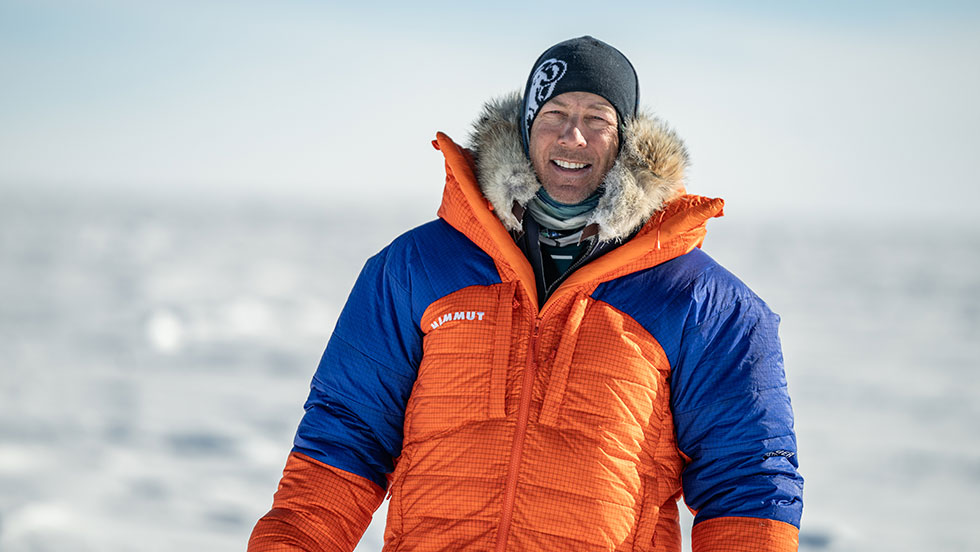
Expedition Anorak and Bibs: Mammut Haldigrat HS Bib Jacket and Pants – This is my main action suit. In Antarctica, it’s too windy to wear soft shells as an outer layer. Equally, soft shells are not breathable enough to be an inner layer. Therefore, my main traveling outfit is just base layers and a hard shell. I’m wearing these all day.
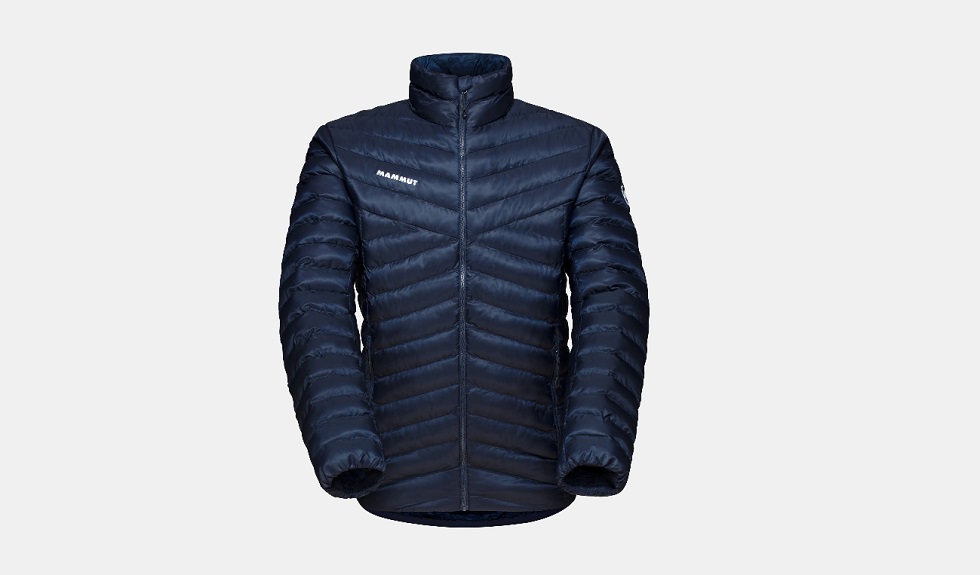
Expedition Down Jacket: Mammut Eiger Nordwand Pro Down Hooded Parka – This is both an emergency and functional layer. Because we are wearing so few layers while traveling, it only takes a minute or so to get quite cold at breaks. Therefore, having a big down jacket that we can wear over our outer shell and harness and that can be easily zipped with mittens on is critical. With a tendency toward more fitted layers, that this is looser and larger is a critical safety feature. Too often, I spend my time zipping up zippers and helping clients put on jackets that might be amply warm at basecamp but don’t pass even the most basic muster on the polar plateau.
Down Pants: Montbell TEC Down Pants – Like all my layering systems, it starts with light breathable layers and ends with a larger down layer. While I could wear these pants while traveling or in an emergency situation during the day over my hard shell bibs, realistically these are just comfort wear for the tent and while going outside to go to the bathroom.
Socks: 5 pairs – I ski in two socks, a light and mid-weight wool sock. I also have two extras, as well as one pair of more comfortable and warm socks for wearing in the tent.
Balaclava/Buff: Buff ThermoNet balaclava and buff. My go-to head system, like everything else, is light breathable layers.
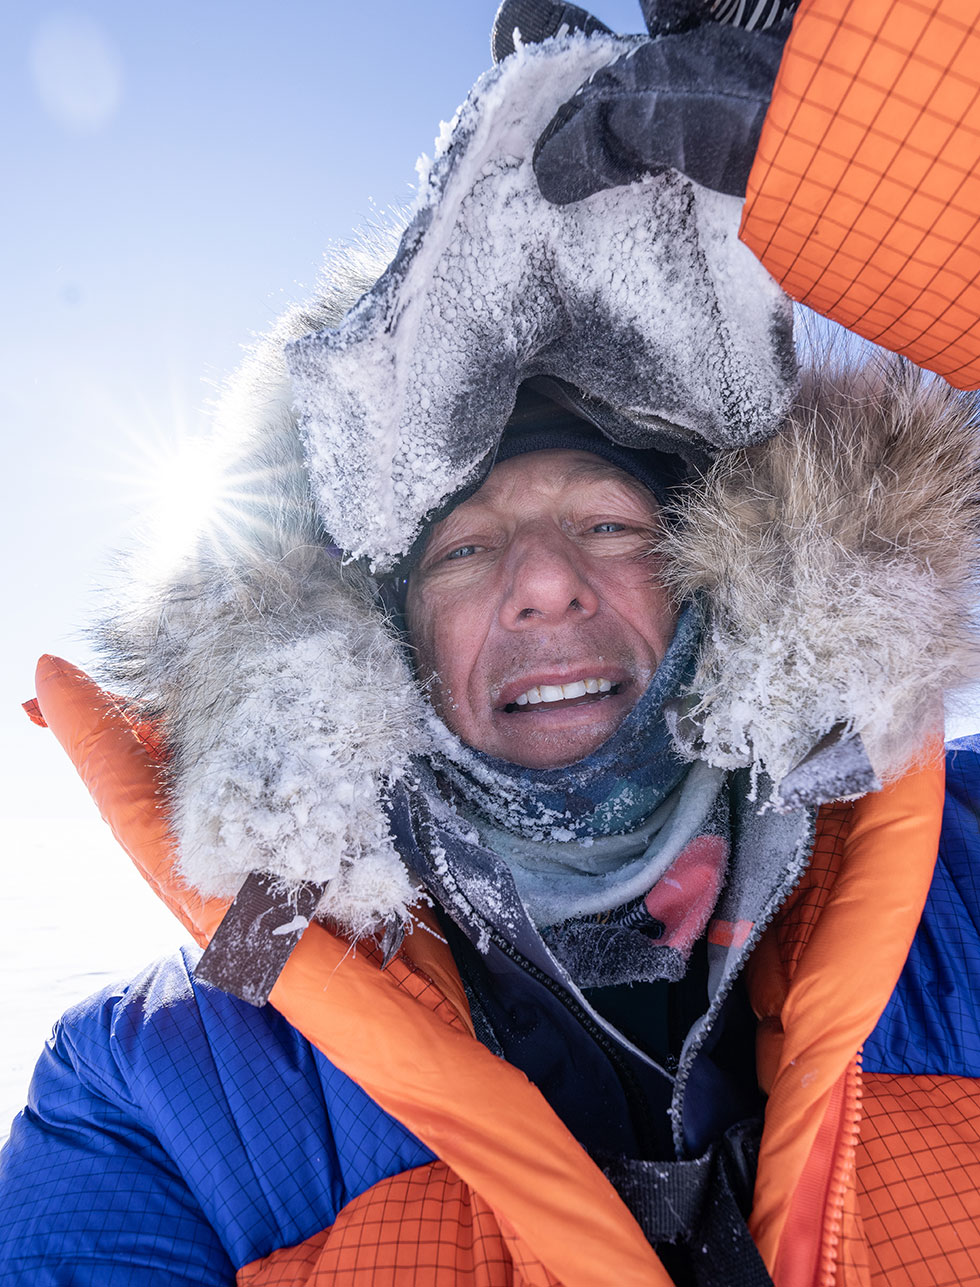
Hat – Mammut Tweak Beanie – A light hat with light fleece lining. I wear it over my balaclava and under my buff. I usually have my jacket hood over everything, but as I heat up, my first procedure for maintaining a normal body temperature is to put my hood down.
Insoles: SOLE insoles – I bring two pairs of SOLE insoles, one thicker and one thin. I keep the spares in my booties but with high arches I really like the additional support. Equally important, insoles help keep my feet warm as they insulate my feet from conductive heat loss through the bottom of my boots. The second thinner pair of insoles are in case I have any feet issues where I need a bit more space in my boots.
Down Booties: Sierra Designs Down Booties – there are lighter down booties out there but these are convenient because they have a closed cell foam sole which makes walking around outside the tent more comfortable and warm. Additionally, they fit snugly so don’t slip off. I usually store my second pair of insoles inside as well.
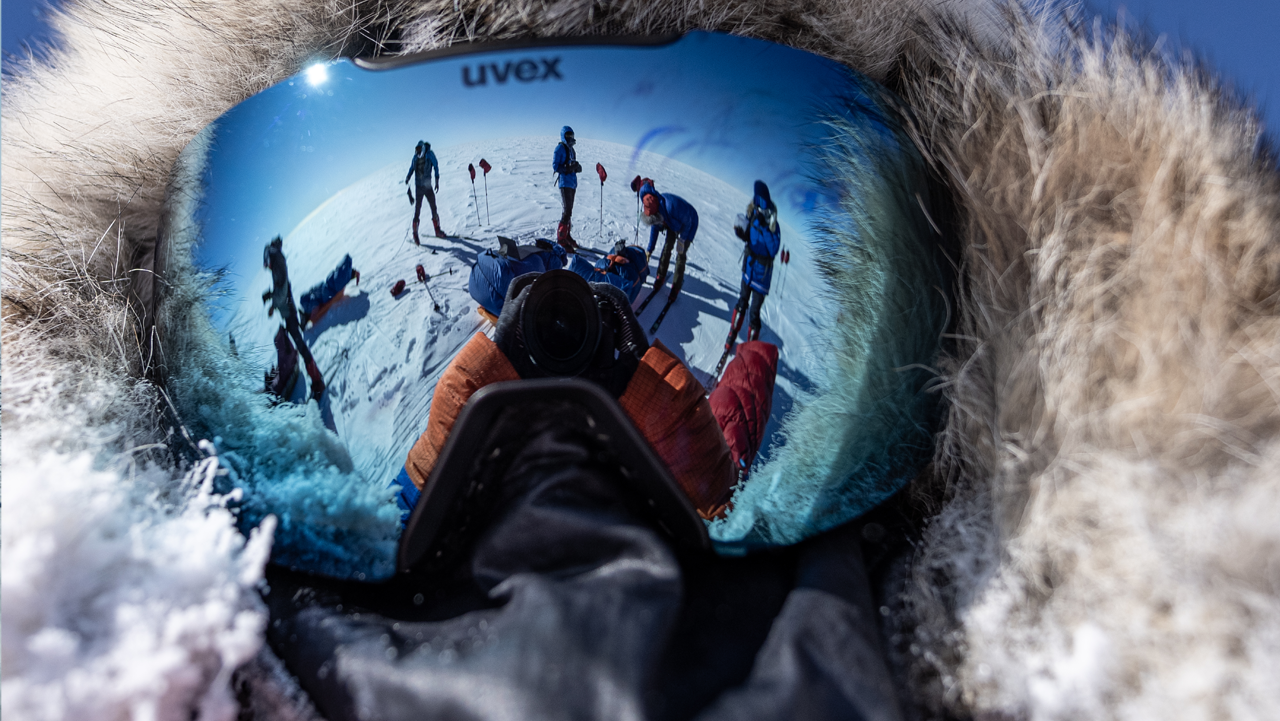
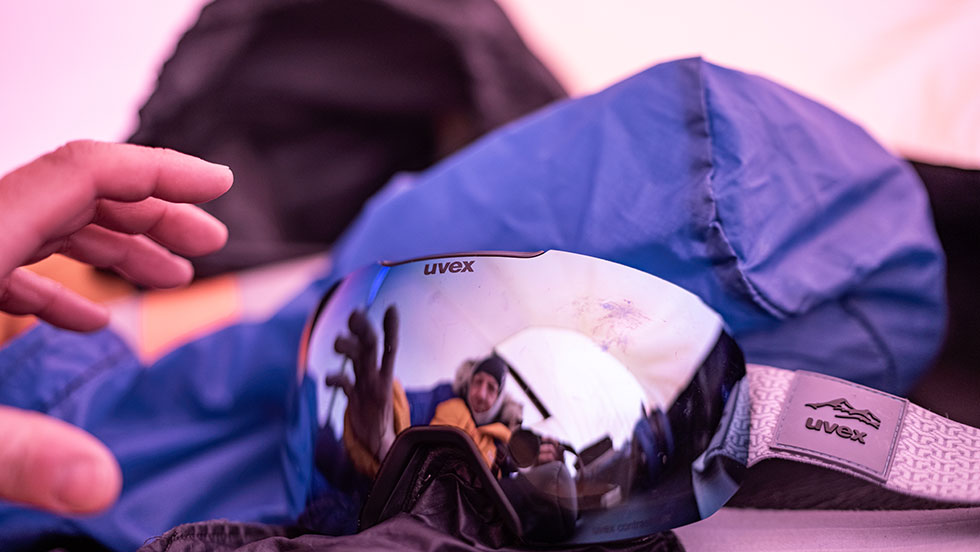
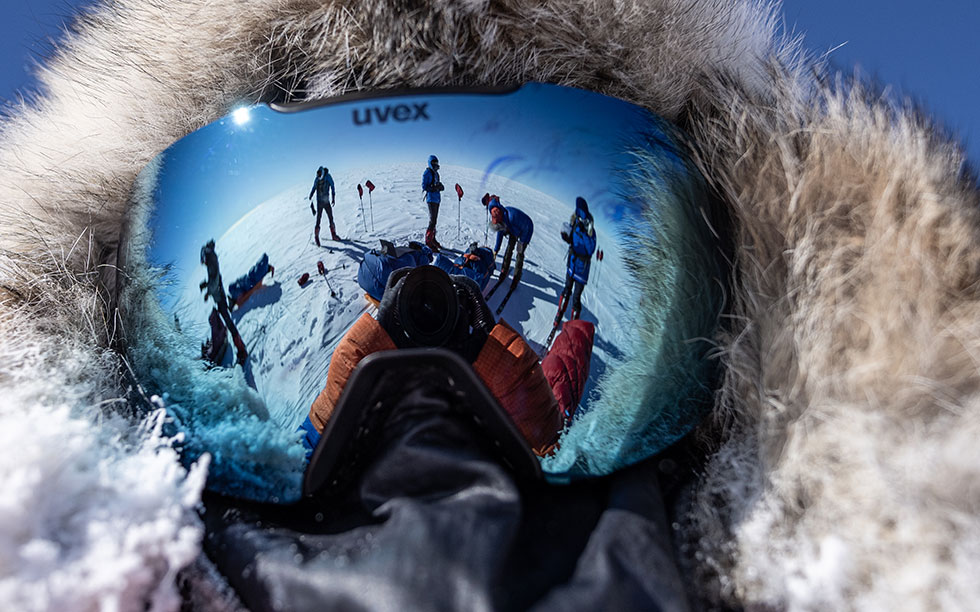
Goggles: Uvex Evidnt Attract cv Goggles – 2 pairs – one with custom nose beak. These are one of my best new addition pieces of gear. These goggles have magnetized lenses that can be switched effortlessly, as well as a wide field of view. They fit great and are padded with a durable and comfortable foam.
Sunglasses: Uvex LGL 51 – I bring them but rarely (if ever) is it warm enough to wear them and have your face uncovered… it hasn’t happened yet, but here I am still lugging sunglasses across the polar plateau.
Sleep System
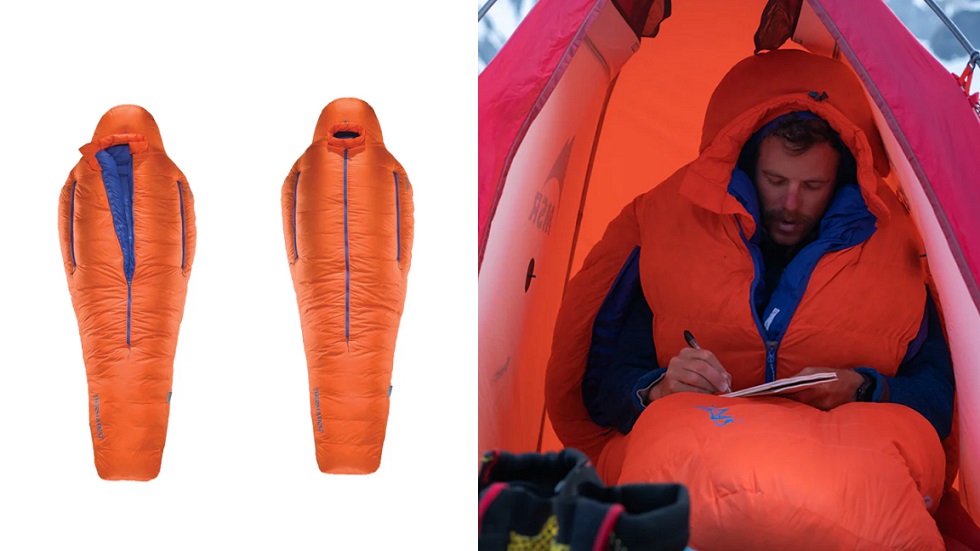
Sleeping Bag: Therm-a-rest Polar Ranger – One of Antarctica’s best-kept secrets is that sleeping in the tent can often be too warm. With 24-hour daylight and four-season tents, there is a considerable ‘greenhouse’ effect inside. Therefore, anything over a -20 sleeping bag is just overkill. I worked with Therm-a-rest many years ago to design this bag that ticks all the boxes for polar travel. Some of my favorite features are the top zip and ‘snorkel’ around the face opening.
Bivy Bag: Sierra Designs Backcountry Bivy – One of my least favorite things is stuffing sleeping bags – especially if they are semi-frozen. Worse yet is after a long day, pulling a frozen sleeping bag accordion out of its stuff sack. Down compresses and the bag becomes colder. Additionally, it’s a waste of time since space in the pulks is more than ample. Therefore, our entire ‘sleep system’ (sleeping bags and pads) is left fully unrolled in a lightweight weatherproof bivy bag.
Each evening, I throw the whole system in the tent and can crawl in and be asleep in a matter of minutes with little to no fuss.
Sleeping Pad: Therm-a-Rest RidgeRest Solar – If I have a super power, it’s that I can sleep anywhere and on anything. Therefore, I tend to go without the fuss (and potential failure) of an inflatable sleeping pad (although most of my clients bring them).
Comms, Navigation, and Power
GPS: Etrex HCX – my old-school GPS from 2008. Skiing to the South Pole doesn’t require a lot of GPS work. In fact, the simpler and more basic the GPS, the better. To navigate across a featureless vast plane, I actually use a compass during the day and travel on a bearing. To get that bearing, however, and mark my daily progress and positions requires a GPS. If it ain’t broke, don’t fix it, and the HCX has been marking my daily campsites for a long, long time now!
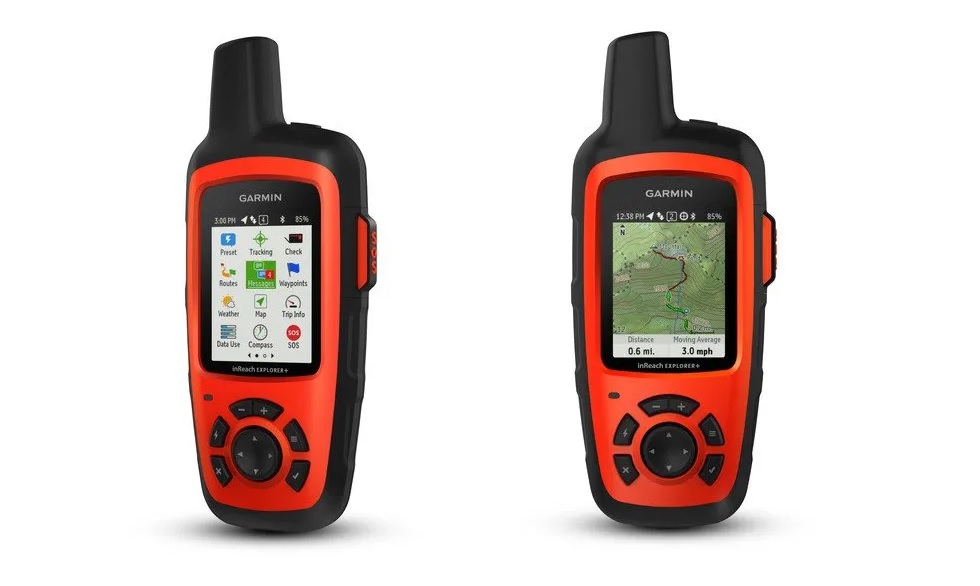
Sat Comms: Garmin inReach Explorer+. The inReach has been a game-changer since it first came out (now over 15 years ago). Obviously, the SOS feature is the most important but tracking is also an important aspect of coordinating logistics and safety, while two-way texting allows an easy connection to home. I like the bigger Explorer+ because it can double as a second GPS, allowing me to get a bearing from a way point.
Satellite phone: Iridium 9505a – There are newer and smaller satellite phones now (at least slightly smaller) but I’ve been taking the 9505a on expeditions for 20 years now and because it runs on the Iridium Satellite network (which are polar orbiting satellites), you get a surprisingly strong and consistent signal in Antarctica. The battery lasts forever and does really well in the cold too, which is a definite plus.
Watch: Suunto Vertical 2 – This is the first time I’ve used a rechargeable digital face watch on an expedition and I loved it. Easy to read. Tons of great features, and I didn’t have to recharge it for the entire Last Degree Expedition.
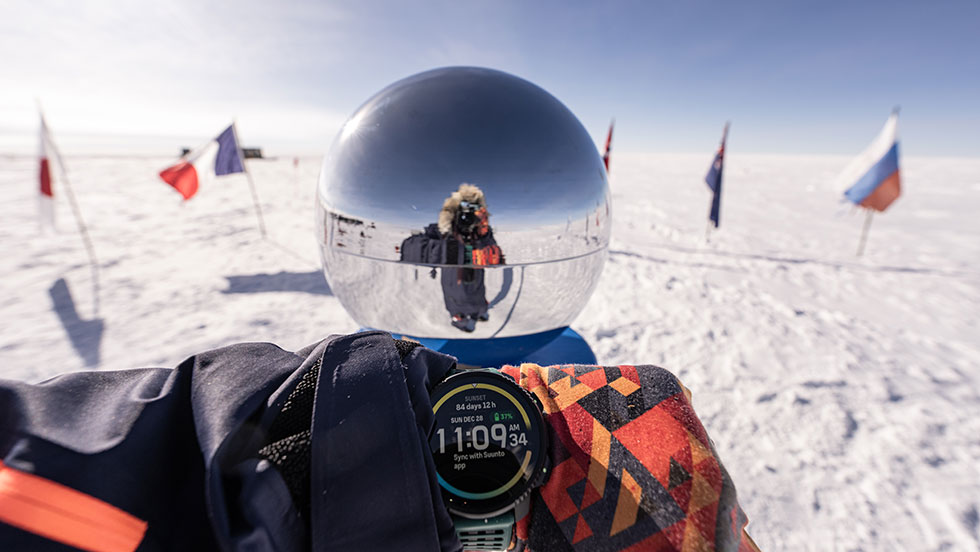
Compass – Suunto MC-2 compass. Once I get my daily bearing from my GPS, I ‘plug’ that number into my compass. Most importantly, the MC-2 is a world-balanced compass – meaning that it works in the southern hemisphere as well. Before phone cameras, I used the compass mirror to check my face for cold damage in the evening.
Compass bracket – In a whiteout it is impossible to ski in a straight line. In these situations, I attach my compass to a bracket that I wear around my waist. To ski, I stare down at the needle (without looking up) and try to keep on bearing as best as possible. It’s brutal on the neck and psyche but it’s better than skiing in the wrong direction.
Portable Charger: Nitecore Summit 2000 Power Bank for Low Temperature – Lightweight and reliable. I love this little workhorse. I bring two. One to use and one to charge from a solar panel.
Solar Panel: PowerFilm 14w Rollable Solar Panel – Durable, lightweight, and even charges in low light situations like Antarctic whiteouts.
Photography
Camera: Sony a1 – I work so hard to keep weight to a minimum but as a photographer, I find it hard not to travel with my ‘big’ camera and a few choice (heavy) lenses and batteries.
Action Camera: DJI Action 5 Pro – I love this camera for its ease of use, high-quality footage, and extremely cold-tolerant battery – easily the best battery of all my electronic gear.
Drone: Antigravity 360 drone – this was my first experience with this drone and can I just say… Holy $#@! It is amazing! Intuitive and easy to fly. Worked well at 20 below. I was just as awed flying this as watching the video in the 360 goggles afterwards. I’ve been talking nonstop about this drone and the content I captured!
Camping and Cooking
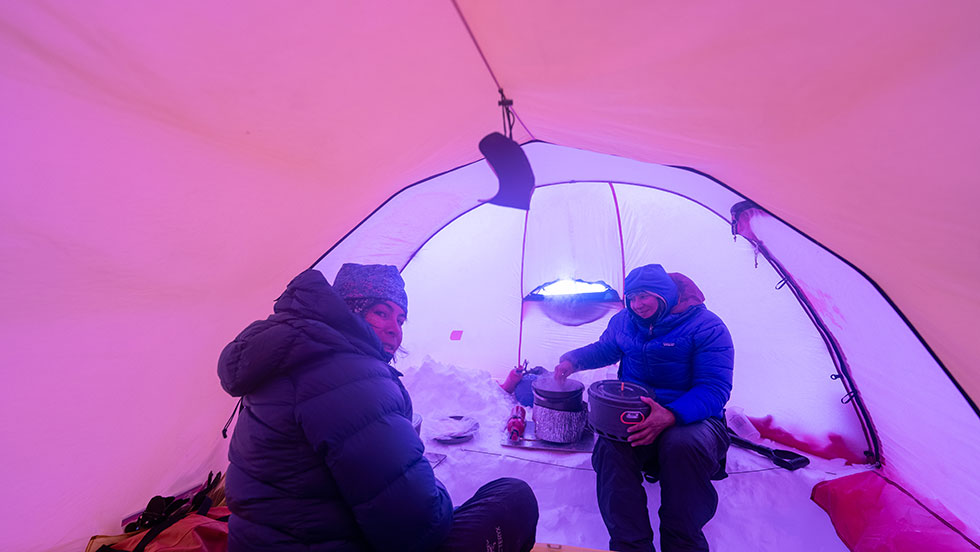
Hilleberg Keron 4 GT – Tunnel-style tents are the go-to tent for polar travel. With wind directions that are fairly constant and an inner tent that hangs from the rain fly, the Keron 4 sets up quickly, especially since we tape the poles together (except for the middle section).

MSR XGK – The best expedition stove ever. A little heavier than the Whisperlite International (which is also a great stove and very usable for Antarctica). For guiding in Antarctica, I like this stove because it’s 100% reliable. It might sound like a jet engine and have no flame adjustment but all I’m doing is melting snow. So the fastest and most efficient way I can do this, the better.
Pot: MSR 5-liter pot – All of our drinking water comes from melting snow, so for a tent group of three that means 3-4 hours of melting snow every night. Having a large and lightweight pot with a nice lid helps make this daily task as efficient as possible. I also like the latches for the lid on this pot, as it holds my stoves, matches, and scoop without them falling out and all over the place.
MSR heat changer: custom – I actually take another rivet and half of an additional MSR heat exchanger onto a standard size to cover my 5-liter pot. It’s not light but basically earns its weight after a few days as the efficiency of cooking increases. Considering that the heaviest things we are carrying are food and fuel, anything that makes cooking more efficient is a good thing. I also make a custom windscreen that is more sturdy than the standard MSR aluminum windscreen that comes with their liquid fuel stoves.
Stove Board: custom – There are many iterations out there, from full-on stove boxes to insulated metal sheets. I use a lightweight 1/4” plywood rectangle with a small aluminum square to help reflect heat under the stove.
Fuel Bottle: MSR – 887ml with expedition caps. I wrap these in hockey tape to help prevent frostbite from touching. As far as the expedition caps, I refuse to use the child-proof caps as they are cumbersome and hard to use in the cold.
Cup: GSI Infinity Backpacker Mug – I used to let my clients bring their own cups but most ended up with tall tippy heavy cups. This GSI mug has a locking leak-proof lid that prevents spills inside the tent.
Bowl: GSI Fairshare Mug – Because we end up repacking our freeze-dried meals into lighter bags combined with additional calories.
Spoon: MSR Alpine Tool Spoon – eat your dinner and fix your stove with the same thing. What more to life is there?
Soup: Yeti Rambler 16 oz Food Jar – Hot soup on an expedition is easily one of my greatest innovations. We make it in the morning and it becomes an integral source of energy and hydration for the day’s journey, as well as a philosophical midpoint to all the pain and suffering of a polar expedition.
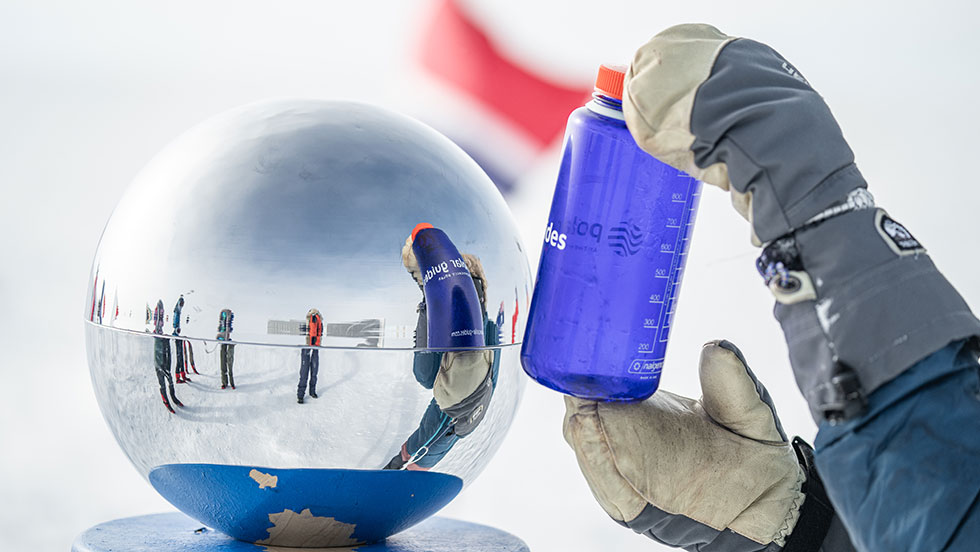
Water Bottle: Nalgene – 2 Nalgenes of water a day keep dehydration away. Antarctica is a desert so staying hydrated in the cold is key.
Insulated cover: Outdoor Research military Nalgene cover – The only real cover to get. All others are too thin to keep water from freezing while hanging out all day in the sled. I buy these from eBay as I haven’t found another place to get them.
Insulated flask: Yeti Rambler water bottle. This is my ‘starter’ water for melting snow in the evening. I love this flask as it kept water warm for over 24 hours.
Shovel – MSR Responder shovel with “D” handle. I like the D-shaped handle so I can use it with mittens on. I also wrap the shaft with insulation and hockey tape to prevent my hands from getting cold while using it. Regardless, a shovel is a critical polar expedition tool.
Snowstakes: Hilleberg – 4 total. Large enough to secure a tent in the snow but light enough to make me want to bring them.

This feature was written by Eric Larsen, a professional polar adventurer and expedition guide.