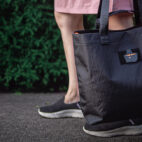
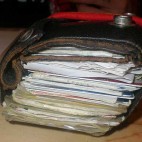
Carry Awards
 Insights
 Liking
 Projects
 Interviews
Carryology delivered. Your inbox. every two weeks.
Only the best stuff (and giveaways!), we promise.

How To :: Make a Leather Key Fob
Hi, Christine Marcelino here from Materials + Process. We’re a small design studio based in San Francisco. We design and craft a line of functional leather goods to support the modern frontier.
I got into working with leather because I wanted to start making things again. I’ve always been a maker but when I started working full time as a designer I found myself doing less and less with my hands. When I became a freelancer, I had the time and flexibility to explore more of parts of the design process that I loved – materials research and making of course!
Working with leather has a pretty high learning curve. Once you make a mark there’s no turning back. Believe me, I’ve spent a lot of money coming to terms with it. Coming from designing soft goods for the outdoor industry, I was used to working with lightweight technical materials that are pretty predictable. What I love about leather is that each new hide is never the same as the last and you have to spend some time finding its best and also not so desirable attributes. Working with leather has taught me patience and slowness. I find meditation in the singularity of the material and the many steps it takes to make the simplest of items.
I want to share with you how to make a leather key fob as an intro to the basics of leather crafting. Here you will find the basics including some of the tools involved, finishing techniques, and riveting.
Tools
I’ve gotten my tools from a variety of places. I’ve always felt like the better quality the tool, the better the end product whether it’s a pen or a hammer. Once you get a basic cutting, stamping, and finishing set you can do a lot. A great place to find everything you need under one roof is Tandy Leather.
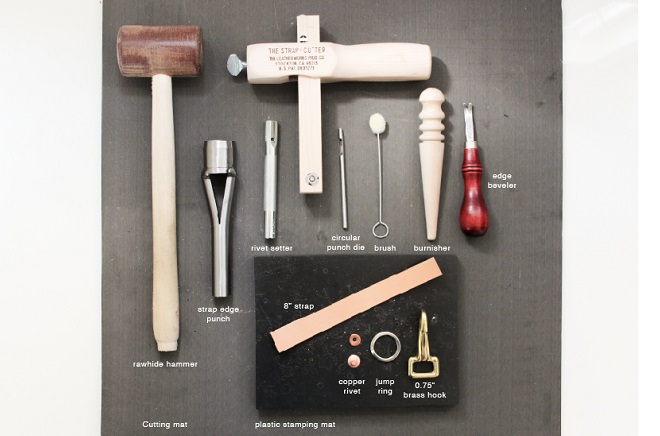
Natural vegetable-tanned leather
I use a natural vegetable tan in most of the products I make. Tanned with tree bark and vegetable roots it’s one of the oldest ways of preserving leather. In its natural state, the leather has no coatings or dyes. The color and texture darkens and softens over time from interactions with the natural environment and the oils from your hands, making each product unique. If you want to learn more I wrote a short intro into the material on my blog.
Leather weight
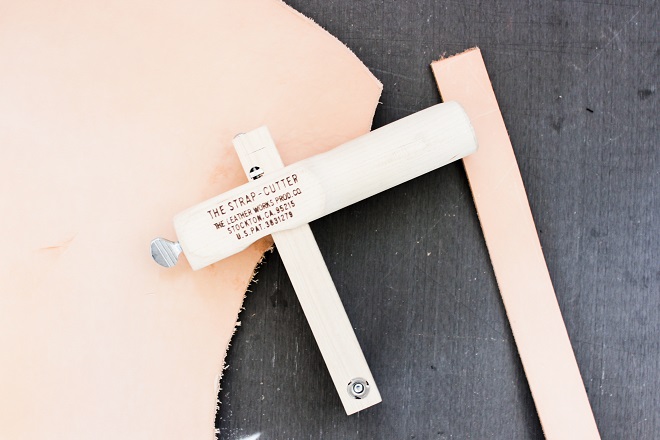
Leather weight is defined in ounces and corresponds to a particular thickness – the higher the number the stiffer and thicker the hide. The leather weight you need depends on the end use. For example, for a saddle you would use 9-10oz. Since this key fob will see a lot of wear but needs to be a little pliable, I like to use a 5-6oz hide. In cutting a larger hide, I would use a leather strap cutter to create even strips. For this purpose, you can even just buy a ready-made strap cut for belts and measure and cut it down.
The Process
– On a plastic cutting surface, cut the strap width to 0.75″.
– Shape the ends with either a cutting tool or steel cutting dye.
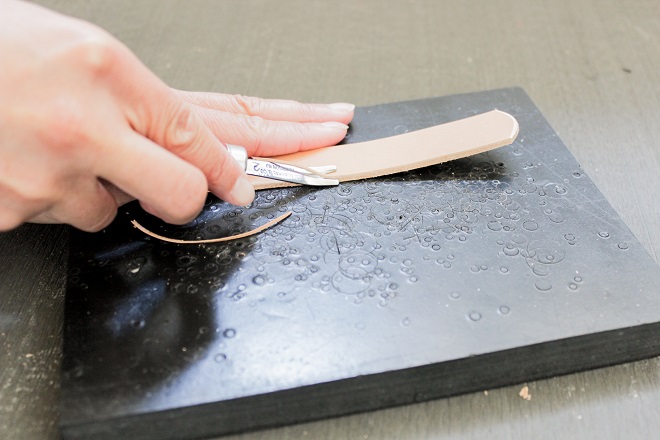
– Use an edge beveler to soften the edges. Beveling the edges creates a cleaner, more finished look. The simpler the item the more the details stand out. It’s easier to cut the edges if the leather is a little damp and of course using a sharp tool.
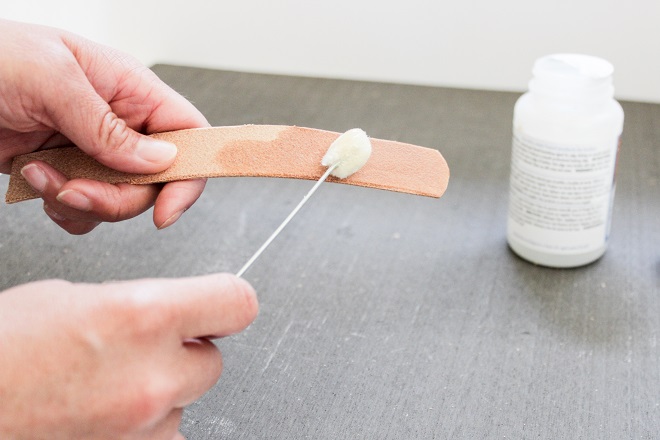
– Finish the back and edges of the strap by adding a finishing agent. Wipe off excess liquid. I like to use natural Gum Tragacanth. After burnishing the edge you can also paint or dye the edges.
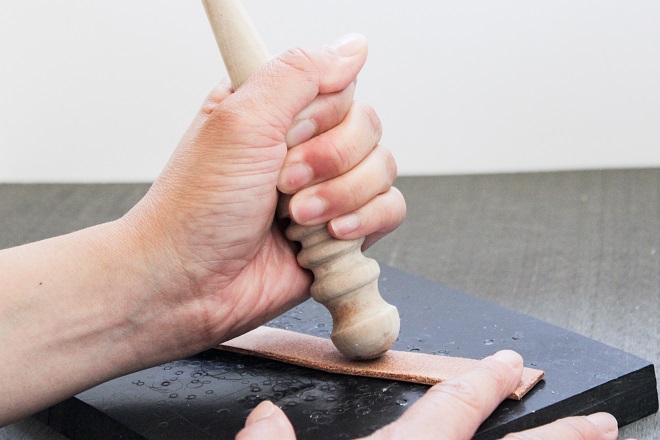
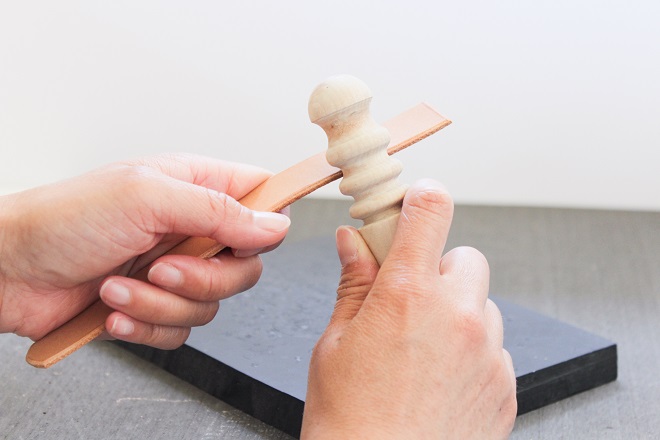
– Burnish the back and edges of the strap with a wood burnisher. Burnishing flattens fibers on the surfaces of the hide. The round wooden tip is for larger surfaces like the back of the strap and the grooves underneath are designed for the edges. If you don’t burnish the surfaces the fibers on the cut surfaces of the hide will start to loosen and shed.
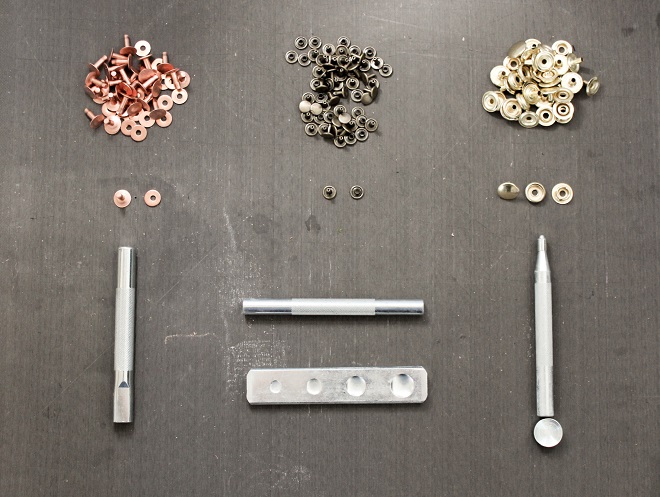
– Depending on the aesthetic and end functionality that you want, there are different ways you can close the key fob. I am partial to copper rivets for the look and for its strength. Rapid rivets are the easiest to use. You can also use metal snaps. Each requires different setting tools to apply it on your leather piece.

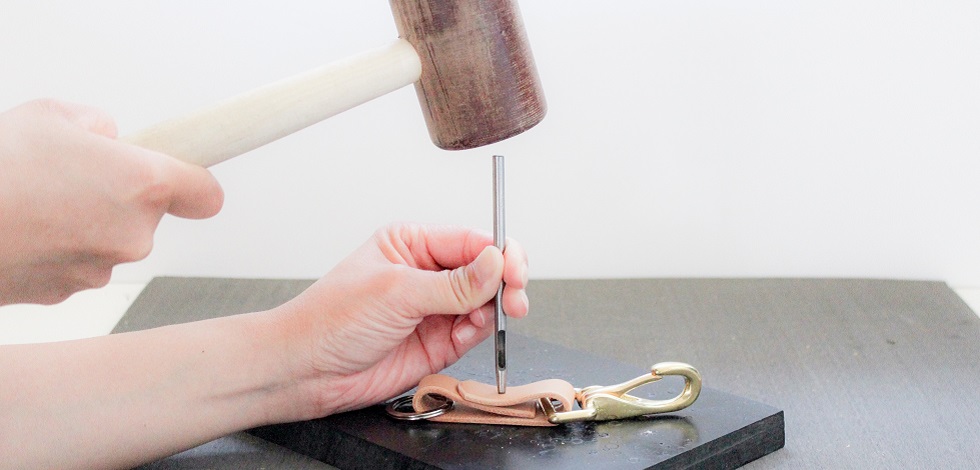
– For this we will use a copper rivet. Mark where you are going to put your rivet in the center.
– Loop through the hardware and fold the leather. Make sure the edges overlap by about 1″.
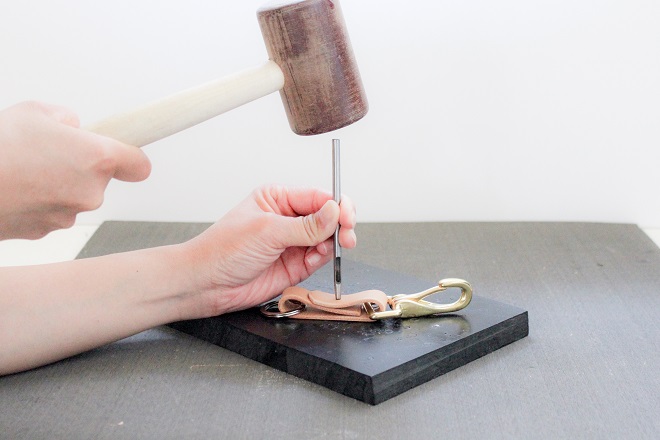
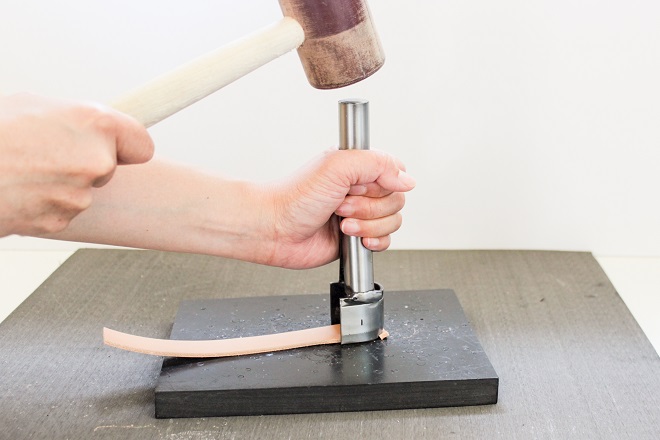
– Take the rawhide mallet and stamp a hole using circular cutting die the size closest to the size of the copper post.
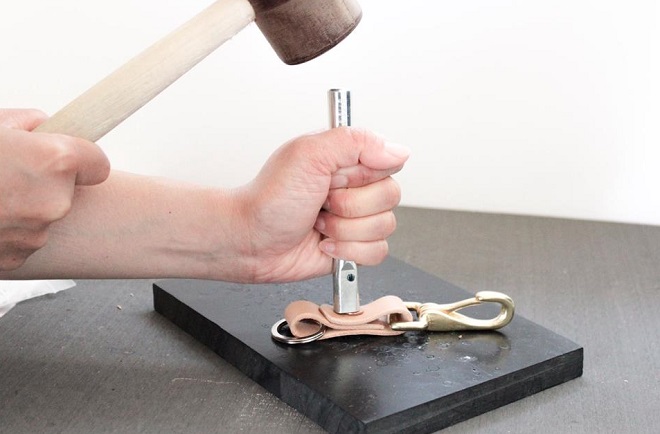
– Push the rivet post through the hole cut in the leather and add the flat circular ring on top. Take the copper rivet setter and place the hole in the tool over the copper post. Hold the setting tool with one hand and hit it with the hammer with the other while making sure the setter is absolutely straight.
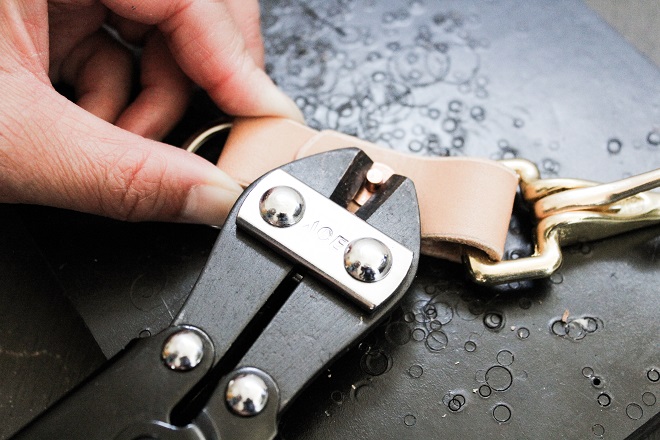
– Cut the post with a side cutter or bolt cutter leaving a 1/8″.
– Use the rounded dome cutout in the setter to round the edges. You can also hammer the edge with a normal metal hammer. This will create a more textured look.
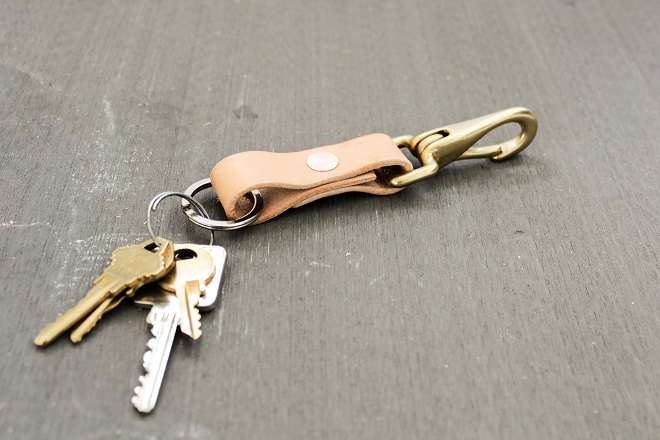
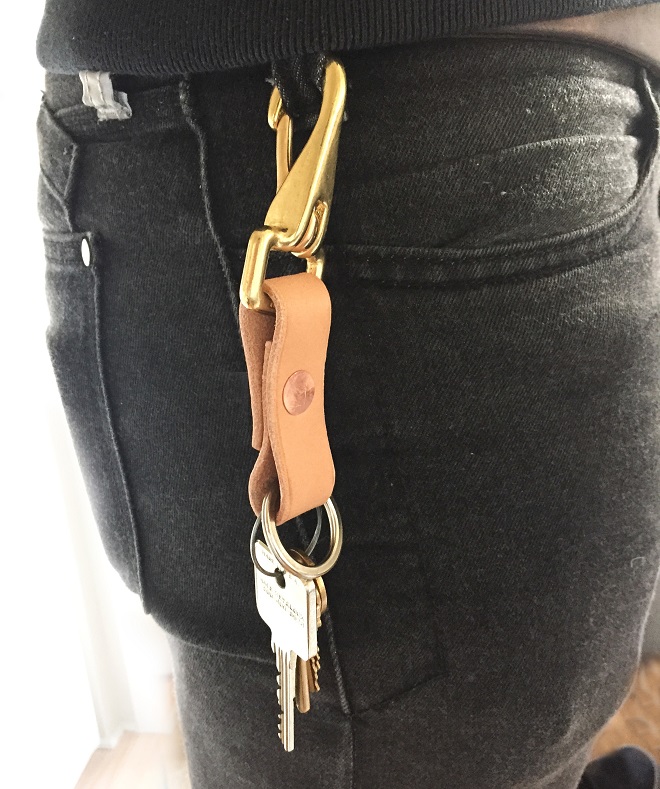
– Now add your keys and enjoy. The leather will naturally condition with the oils of your hands with use. But if you forget it in a drawer and one day find the leather to be stiff and brittle, use a natural conditioner like neatsfoot or mink oil to condition the leather.
Hope you find as much enjoyment in the process as I do. Cheers, Christine.
*Oh, and if you’re keen to see more of what I do, please check out my new Sacagawea Carryall on Kickstarter…