Carry Awards
 Insights
 Liking
 Projects
 Interviews
Carryology delivered. Your inbox. every two weeks.
Only the best stuff (and giveaways!), we promise.

How to Find the Right Hiking Pack for You
If you’re scouring the internet for the perfect pack, I feel your pain. I too partake in the ceaseless journey to find the end-all be-all, and while we may never find the proverbial perfect bag, there are a few things we should consider up front that will get us closer to pack nirvana.
Handle It
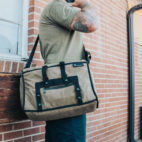
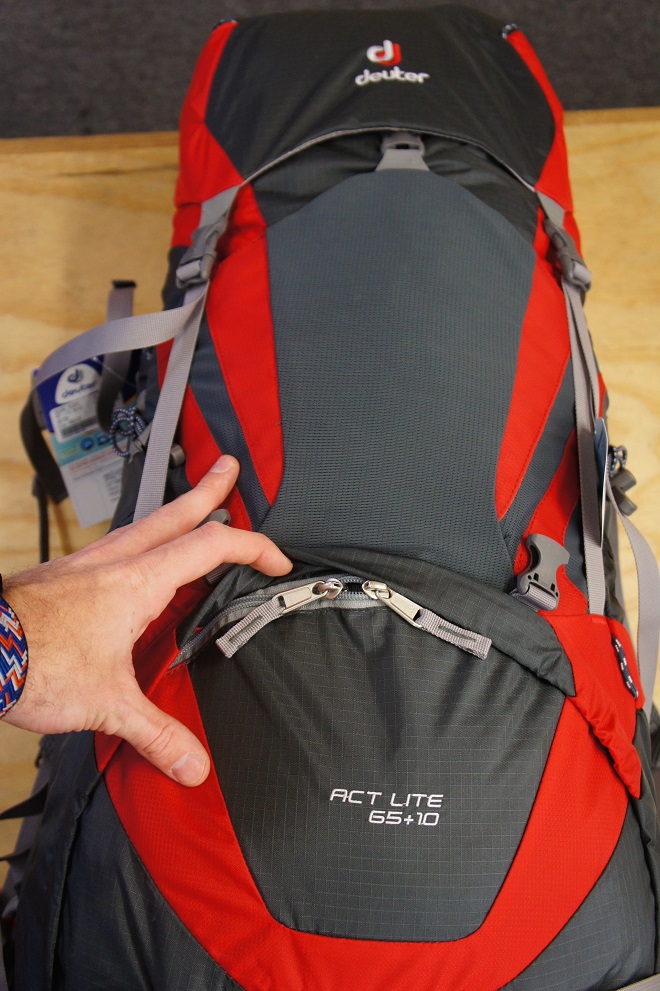
Firstly, an outdoor bag is one of those things that needs to be seen and touched. The market is so stuffed with options that deciding to buy one bag over the other based on internet research alone is too risky. Sure, you might be stoked with your purchase, but what if the competitor’s bag proves to be a way better deal when held in the hand? Get out to your local shops and, at the very least, finger through the backpack selection to see and feel what some of your options are. Try them on and throw some weight in them, please!
“Get out to your local shops and, at the very least, finger through the backpack selection to see and feel what some of your options are.”
Make a List
Secondly, I encourage you to make a list of requirements that your future bag must meet. If a pack doesn’t meet one of the requirements, then it’s not up for consideration. The list is something that changes over time, but overall is a reflection of your recreation needs and style and will grow more specific with your experiences. So if you’re sorting your search results by “most popular” or “highest rated”, take a moment and make sure you’ve covered the basics.
“Volume is essentially dictated by your trip, but you’ll also need to consider how much weight you’ll be carrying and determine whether or not the suspension system can handle it.”
The Basics
Volume & Weight
What are you carrying? How long will you be out? Do you have opportunities to reload? Volume is essentially dictated by your trip, but you’ll also need to consider how much weight you’ll be carrying and determine whether or not the suspension system can handle it. (Weight and volume are related, but they aren’t the same thing. Think of carrying 40 pounds in a 65-liter pack – that’s a full winter load or five days hiking a loop. Now drop your volume to 30 liters and you’re likely at GORUCK Heavy. You need different bags.)
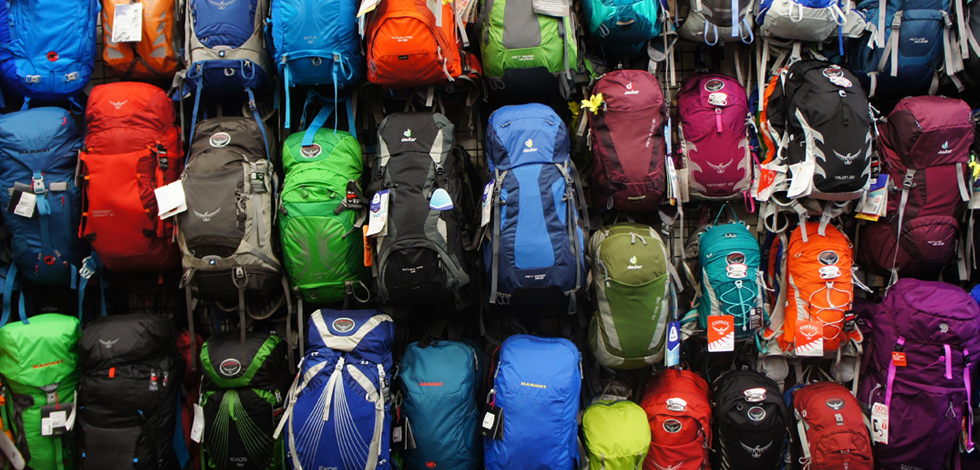
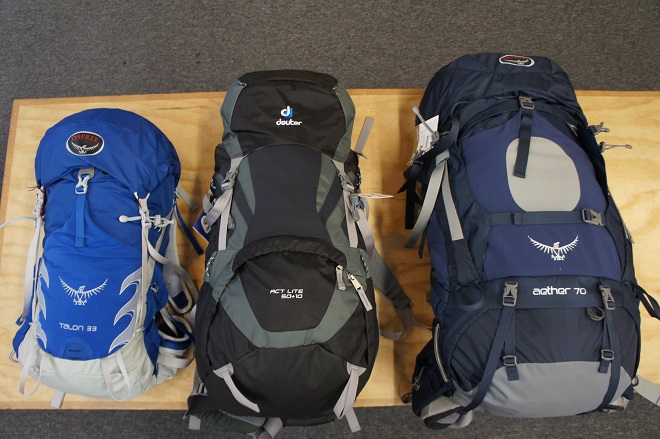
Most people will classify bags by trip duration. There’s a lot of subjectivity involved with the classification, but in general you’ll see these three:
Day bags: 0-30 liters – These bags have room for lunch and layers. You’ll be carrying your ten essentials and maybe a camera, but not much else. If you’re experienced you could do some fair weather hammock camping or some fast packing with a bag of this size, but in general this is an out and back bag for day-to-day adventures.
Two-day bags: 45-50 liters – Two-day bags are classified as such because it’s indicative of shelter and a sleep system. On these trips you’ll carry a lightweight backpacking tent and a sleeping bag/pad along with your water purification system and a small stove. The remaining space will get stuffed with your food, clothing, and your essentials.
When traveling with a friend, two 50L bags is more than enough for a long weekend with some luxury items, as much of your equipment will be shared. Be sure to split the weight evenly but BYOB.
Multi-day: 50 liters and up – Depending on your experience level, the season in which you are traveling, and the duration of your trip, these bags are designed to sustain your needs for 5-10 day trips. You’ll need to carry everything from your shelter, sleeping system, and cooking needs, to toe nail clippers and biodegradable soap.
“Making sure your bag fits you is the most important part of the selection process. You’ll need to get your torso measurement first.”
As a general rule of thumb if you are deciding between two different volume bags, go up. It takes real discipline not to put 50L of gear in a 50L bag, but it would be very difficult to go out for a few days alone with a 40L bag. Conversely, it won’t kill you to take a 50L bag with a good compression system out for a scramble with your friends. Having it and not needing it is better than needing it and not having it.
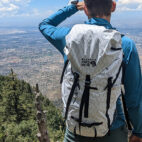
Fit
Making sure your bag fits you is the most important part of the selection process. You’ll need to get your torso measurement first.
*Huge thanks to the folks at Second Ascent for giving us their space while we fondled their bag collection.*
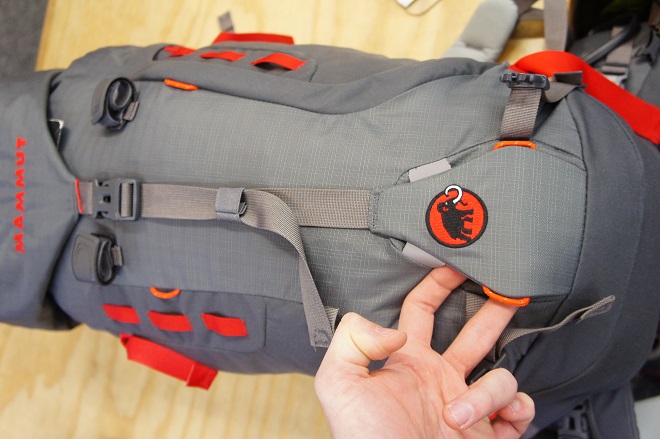
“Your suspension system is essentially all the parts that hold the bag securely to your body”
Some companies offer different hip belt sizes (Granite Gear), others use adjustable systems with moveable padding (The North Face Terra) to increase comfort and ensure a proper fit. Make sure that the padding is sufficient for the weight you’ll be carrying; any shop worth its salt will have weighted bags to load up the pack. I will typically load a sleeping bag or dummy sack in the bottom and then test the bag with 20 and 40 pounds to make sure there aren’t any hot spots. Make sure you’ve got enough room to move your head around too. Some bags with adjustable torso lengths can have taller frames that stick up a good deal above your shoulders – tilt your head back and make sure you’ve got a full and comfortable range of motion.
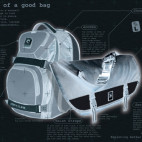
Suspension & Padding
Your suspension system is essentially all the parts that hold the bag securely to your body and includes the back panel, hip belt, shoulder straps, sternum strap, load lifters, and stabilizer straps. Some bags might not include one or the other, but in general this is the setup you’ll see. There’s an old saying about buying used firearms: “buy the barrel.” If the barrel is in good shape, you’re probably making a good investment. When buying a pack, the suspension system is a make it or break it deal. If you can’t carry what you’ve got to take securely and comfortably, then what’s the point? Here are a few of the more common features and their benefits to help you determine what you might need:
Removable Frame Sheet: Included in packs of all flavors, removable frame sheets are often molded out of semi-rigid plastics and are included on the back wall of the pack. When inserted into the back panel they provide structure and support for carrying heavier loads and can be removed for summit pushes or airline compliance. Some companies (Gregory Alpinisto 50 & Gossamer Gear Mariposa) have begun using thin, closed cell foam as a multi-use frame sheet: something to support the load while on the move and something to sit on while at camp.
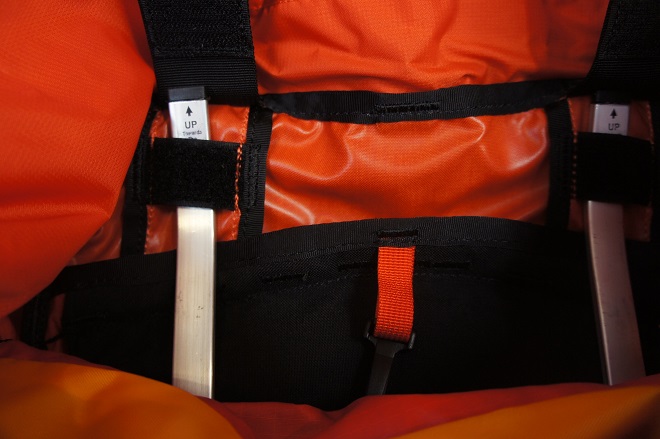
Aluminum (Internal Frame) Stays: Sometimes included on the frame sheet as mentioned above, or found in all shapes and sizes on internal frame packs. Aluminum has long been the choice of manufacturers for providing lightweight structure to our soft goods, and while carbon fiber has made inroads, it is still reserved for high-end specialty bags. The “stays” are two nearly parallel slabs of aluminum that run the length of the pack, giving the shoulder straps and hip belt a solid platform to lift (Kelty Red Cloud 110). These days we are seeing all sorts of frame shapes but the principle remains the same (Osprey Peripheral Suspension).
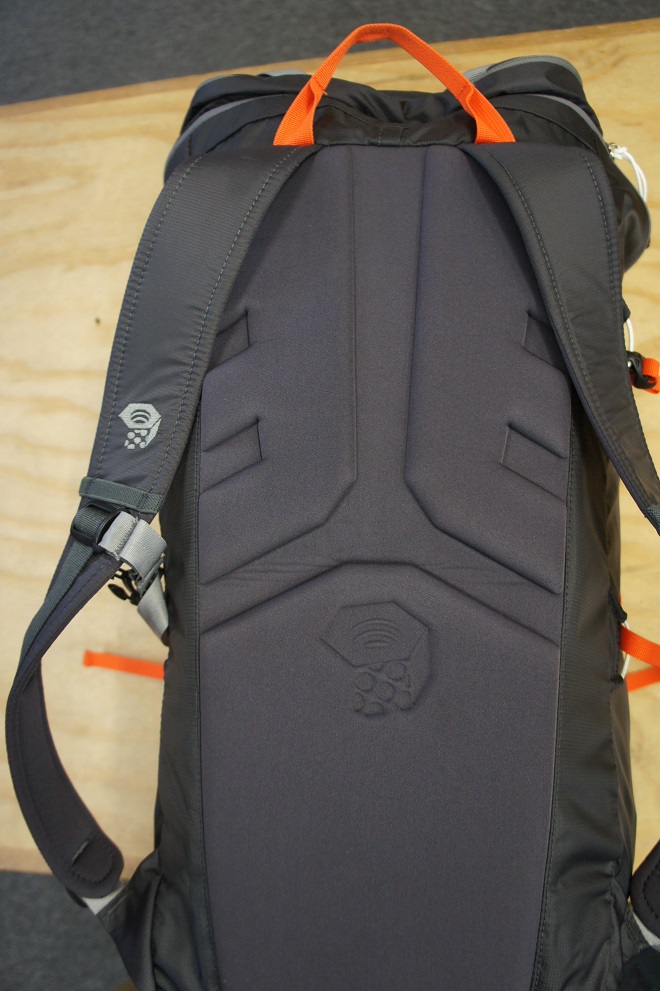
Trampoline Suspension vs Ventilated Padding: Ventilation has been an issue since people started carrying stuff on their backs. You’re working hard, you’ve got 30 pounds on your back, you’re sweating. Kind of inevitable. Companies have worked to increase comfort and ventilation by contouring the padding of the back panel to allow air to move between your body and the pack. A step up from that is called a trampoline suspension system that lifts the bag completely off your back using a mesh panel held in tension by an aluminum frame system. This allows way more airflow but moves the weight of the bag farther away from your center of gravity. The center of gravity shift makes the tramp suspension a difficult thing to pull off in larger volume bags, but the Anti-Gravity system from Osprey has really shaken the boat.
If you’re going rim to rim on the Grand Canyon, you’ll want to check out a tramp suspension for sure. On the other hand, if you’re doing an overnight trip in January it probably doesn’t matter as much.

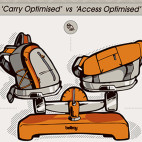
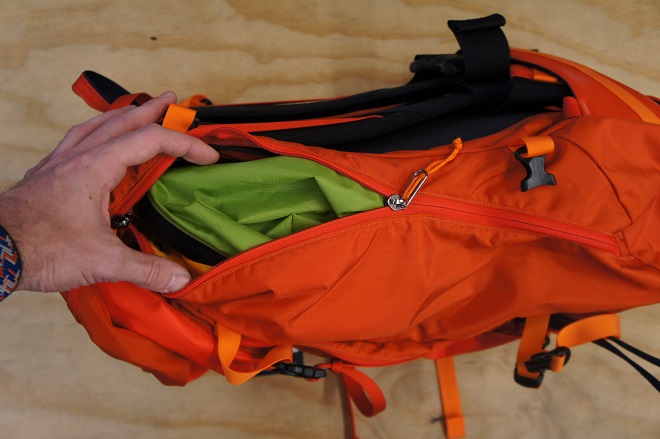
Main access
Now on to the bag itself. There are three kinds of main access points: zippered bags, which are most often of the daypack variety; roll tops, which offer versatility and superior weather protection; and cinch tops, which are extremely easy to secure and access but require a lid/brain to keep them weatherproof.
Your standard day bag will have only one access point to the main compartment – its main zipper. Zippers are awesome, except when they’re not. The draft guards/storm flaps/extra material used as a backing or protection layer often gets snagged when zipping in a hurry, and zippers are the weakest point of any bag. One misaligned tooth can render even the highest quality bag out of commission. Look for larger gauge (#8 and up) coil zips that are self-correcting and don’t forget to clean and lubricate your zippers after hard use. I’ve seen people use anything from a Q-tip and dental floss to a pocketknife and a Shop-Vac to clean their zips, though it’s recommended to use a coarse brush and cloth.
Larger, full-feature bags may have two or three access points to the main compartment. The benefit here is that if you’ve packed your stove closer to the bottom and decide you want a cup of tea after lunch, you don’t need to unload your entire pack to access that single item. Many large bags have dedicated sleeping bag compartments, which double as access points via an additional zipper or toggle into the main compartment. Some will have side access zippers (Deuter Guide 45+) and others may have front door access where a front panel may drop down completely, exposing your well organized kit (Granite Gear Nimbus Trace Access). Innovations in main compartment access like the “U” zip (Arc’teryx Altra 65), the Tri-Zip style bags (CamelBak and Mystery Ranch), and the roll bottom (Bush Smarts Kickstarter) are always hitting the market and keep designers on the offense, which is awesome for us.
“Look for a floating/detachable version that will allow you to throw your sleeping pad or a rope between it and the main compartment”
Cinch Tops will always have a lid or brain in order to keep their contents protected from the elements. Look for a floating/detachable version that will allow you to throw your sleeping pad or a rope between it and the main compartment. Often, these lids will convert into waist packs for shorter trips, which is a bonus, but not a deal breaker in my book. The lid, or brain as it is sometimes called, is a great place to store smaller items that you will need regular access to.
Other features to consider
Now that you’ve sorted out the nuts and bolts of the pack you’re looking for, it’s time to look at what makes it unique and gives the bag its own personality.
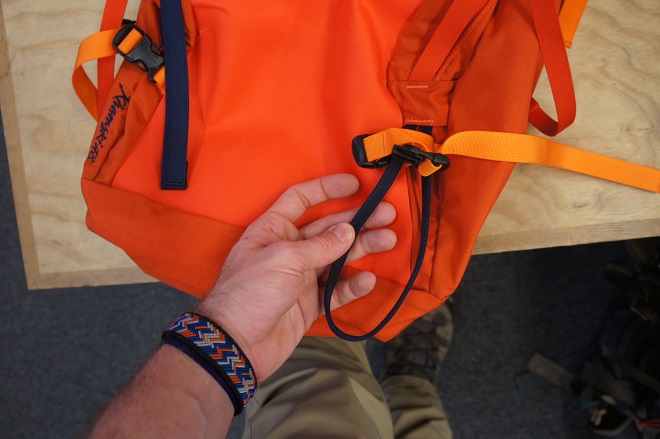
Compression System: Right at the top of the list for additional features is a solid compression system. Personally, I rarely carry more than 15 liters of stuff, but my daily bag is 30 liters. With a well laid out compression system, I can easily go from a flappy 30 to a nice and tight 15 in just a few seconds. The compression system becomes even more important in larger volume bags where stability is a must for uneven and unforgiving terrain. If you’re going out for only a night or two and the only bag you own is a ginormous 70-liter monster, you’ll need to be able to secure your gear inside so that it won’t jostle around in the extra volume you’ll have left over. Good compression straps make your bag more versatile and even give you the opportunity to attach extra gear to the outside of your pack. Running a fishing pole, a sleeping pad, or tent poles down the side of the pack held taut by compression straps is a great way to carry longer equipment.
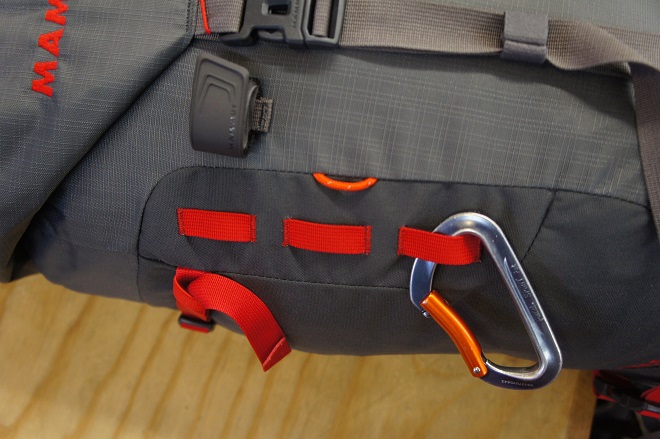
Tool attachment: Lots of bags will provide you with gear loops at the bottom of the pack to hook on your trek poles or an ice tool. These loops are often paired with some shock cord pulls or Velcro straps further up the bag to secure the handle of your tools. These are simple and lightweight features that also give you the opportunity to create solutions for problems other than their intended use – be creative.
The other variety of tool attachment is webbing: MOLLE, PALS, or daisy chain. The first two are a military flavor of nylon webbing ladders that you can attach a whole slew of pouches and pockets to for additional storage and easy access. Want to run a Nalgene on your hip belt but don’t have a pocket there? If you’ve got webbing on your hipbelt, Hill People Gear has you covered. Want to attach a handheld GPS to your shoulder strap? Tried and true Maxpedition has what you need. Look for webbing to attach items on your shoulder straps, hip belt, front face, sides, and even the interior of a pack to fit your needs. Daisy chain is similar but runs vertically and is not uniform across brands, but gives you the option to run shock cord through it to make nets or to hook any number of items to it via a D-ring or carabiner.
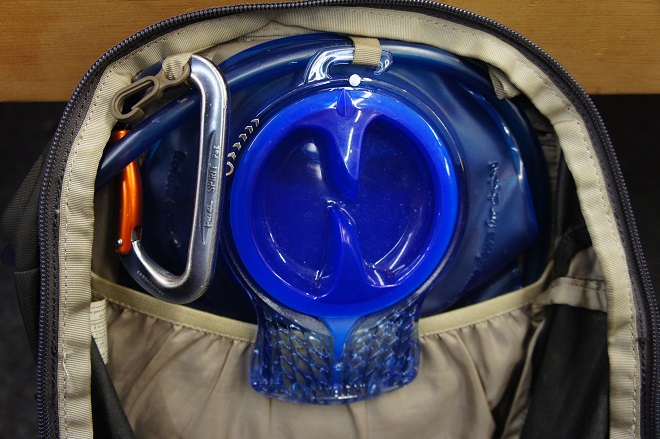
Hydration Systems: Pretty much all bags these days come with a sleeve on the back wall of the bag that will allow you to throw in a reservoir/bladder. They’ll range from 1-3 liters in size. When I’m not using that sleeve for its intended purpose, it serves me well as a spot to keep a notebook and some light reading material. What I believe is more important are the mesh pockets on the sides of the pack. How big are they? Are they angled so I can reach them while the bag is on my back? Are they deep enough? If they aren’t, is there something for me to attach my bottle to so it won’t fall out? Some commuter bags have taken up smaller pockets in favor of slender metal water bottles. That’s all good and well, but for an outdoor bag I’m looking for generous side pockets for a Nalgene, fruit, a hat and gloves, or whatever else I may need fast access to throughout my day.
Waterproofing: This is hugely importante amigos. You do not want to carry everything you need with you only for it to get totally soaked. Some people are firm believers in the garbage bag liner, others like myself use individual dry bags for organizational reasons and weather protection. At the very minimum you’ll want to consider some sort of bag liner, though a rain cover/fly is better; these are sometimes included with bags or can be purchased through the manufacturer. They can be used to signal, sit on, and collect water in a pinch. Some bags now are made out of waterproof fabric, often in the ultra lightweight category like offerings from CiloGear and ZPacks. Bottom line is, whatever you decide to go with, it has to work!
The Wrap Up
It’s important to remember that everyone is different and that there is no such thing as a perfect bag. When we go out, we live and we learn. Every time I head back to the car I’m thinking, “Damn, I gotta try that next time.” Our needs will change with our approach to our passions and so will what we carry and how we carry it. The important thing is that we are consciously thinking about how our gear impacts the way we experience the outdoors and that we are constantly evolving to improve it.