Carry Awards
 Insights
 Liking
 Projects
 Interviews
Carryology delivered. Your inbox. every two weeks.
Only the best stuff (and giveaways!), we promise.

Backpack Mods Part 1 :: VINJABOND
When it comes to minimalist travel carry, John Cain from VINJABOND.com has it nailed. Having embraced the vagabonding lifestyle – essentially a lifestyle of constant travel – he’s also developed some handy tricks for modifying gear to suit his needs. Below he shares his DIY approach to giving backpacks solar charging capabilities so you can keep your devices juiced wherever life takes you…
.
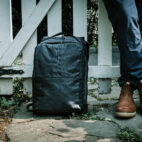
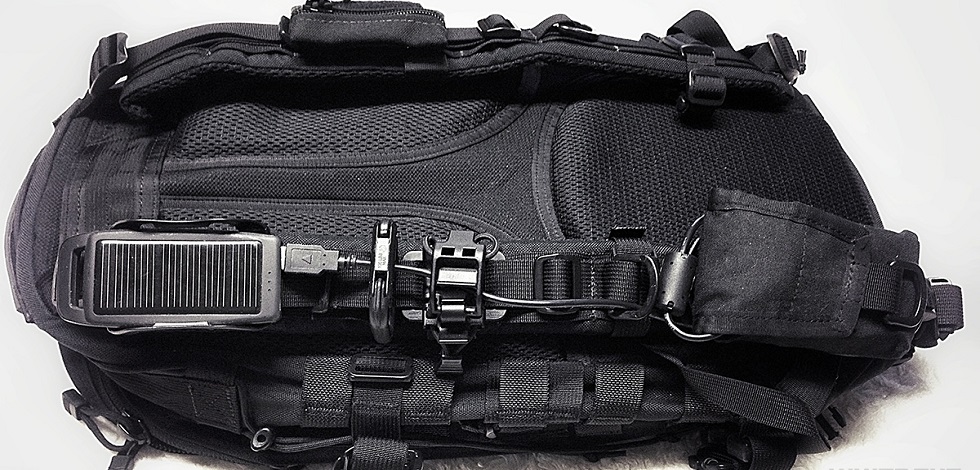
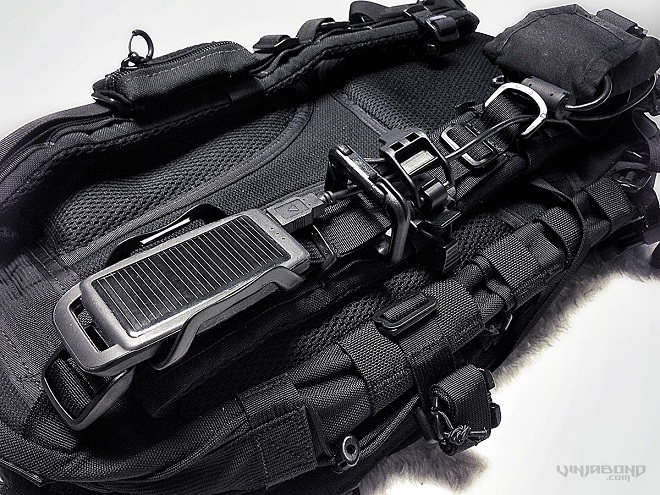
If you’ve researched Triple Aught Design’s FAST Pack Litespeed, you may have come across my photo of the first generation model with this modification. I’ve been using this setup for nearly three years but recently applied it to the new model, as pictured.
.
The concept is simple. A solar charger collects power throughout the day while the backpack is equipped. The actual charger retains its own energy or it can directly power a larger external battery or smartphone or any other USB enabled device. The solar charger is attached to the top of the shoulder strap to maximize the sun’s rays. A power cable is connected to the device to be charged which is held in a pouch attached to the bottom of the strap. The whole gig is quite inexpensive as most people will have several of the necessary parts to begin with. The solar charger is probably the only item that will need to be purchased.
.
For the purposes of this instructional, I’ve used the FAST Pack Litespeed, but with a little creative thinking you should be able to develop a similar setup with any backpack.
.
Due to my minimalistic vagabonding lifestyle of living out of a backpack, I’m limited in materials and tools. So all modifications and augmentations I make to my gear and EDC methods is possible without special tools or equipment. I use what I already have, cannibalize or repurpose parts if necessary. My process usually begins by laying out everything from my backpack and trying to piece together different things to solve a problem. So it’s likely you’ll be able to perfect your own solar charger gig on your backpack better than I could in the comforts of your own home.
.
.
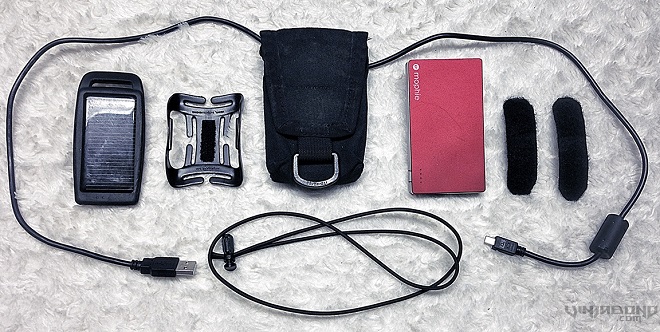
Components:
Sunpak Solar Charger $20 / Buy
Repurposed Water Bottle Clip $0 / NA
TAD iComm Pouch $20 / Buy
Mophie Powerstation Battery $80 / Buy
Velcro Tabs $2 / Anywhere
USB or Lightning Cable $0 / NA
Bungee Cord or Lanyard $0 / NA
Update: The Supak Solar Charger is now unavailable. Try these instead: Solar Charger or Nexcon Solar Panel.
.
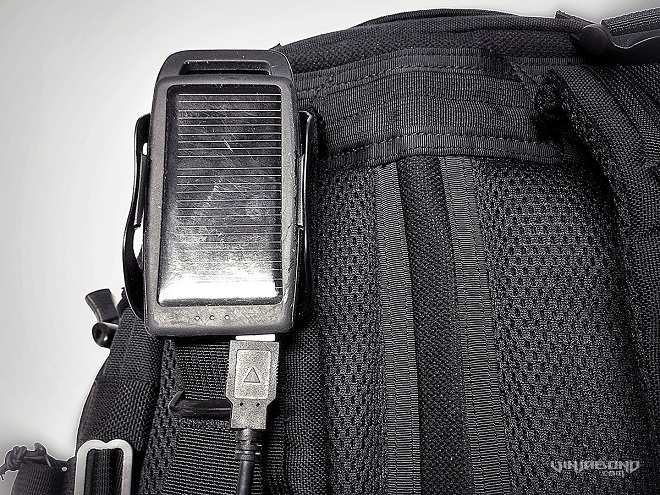
Step 1) This type of solar charger is about the size of an iPhone so it’s a perfect companion to backpack straps. The FAST Pack Litespeed has MOLLE along the straps so it’s particularly easy to attach. Using the Velcro tabs, loop them into the MOLLE to secure the clip in place. The solar charger can then be inserted onto the clip. Alternatively if you can’t find a compatible clip, you can place Velcro on the back of the solar charger instead. Industrial strength Velcro will be more than adequate.
. .
Tip: To get the most efficient sun power, the face/panel of the solar charger should be as directly towards the sun as possible. So have the charger attached in a way that it can adjust angles.
.
.
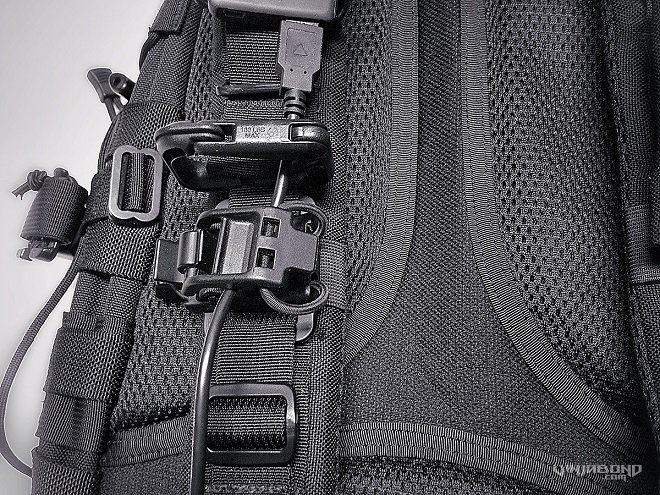
Step 2) Attach the USB cable to the solar charger. Route the cable downward with as little slack as possible. I use a plastic carabiner, a multi-purpose gear clip and the FAST Pack’s already equipped D-rings. For thin cables, you can wrap it through the MOLLE points as well. Alternatively if your backpack strap has no special enhancements, strips of Velcro could be used to route the cable as well. The hook (aggressive) side of the Velcro should never be exposed as this will cling to most clothing in damaging ways.
.
Tip: Don’t wrap the excess wire around the shoulder strap as this material will grip clothing, causing discomfort for the wearer and strain to the strap.
.
.
Step 3) Attach the pouch near the very end of the same strap. Place the pouch in your own “sweet spot”, where you can reach it easily without having to remove your backpack. This will be especially convenient if you decide to put a frequently used smartphone/GPS/MP3 player in the pouch. The iComm pouch that I use is made by TAD, the same company as the backpack, so it attaches seamlessly through the MOLLE. But almost any other tactical pouch will fit similarly. Traditional (small digital) camera cases are also good options but may require some creative attachment configurations. But again, Velcro will work well. Connect the other end of the USB cable to the desired device for charging.
.
Tip: The pouch can also be used to store the cable and solar charger for times when you don’t want your backpack to be too conspicuous or during bad weather.
.

.
As mentioned above, I’ve been using this setup for quite some time. It’s given me the ability to keep my iPhone charged throughout my highly irregular and nomadic lifestyle, from constant flights to endless bus rides to uncharted parts of the world – places and situations where keeping an energy-hungry device happy and full would otherwise be impossible. Music when I want it, Internet when I need it, social for when I’m bored and most importantly to document every part of my travels.
.
Of course, this method of harnessing free energy doesn’t need to be restricted to travel. As long as you’re using a backpack, whether commuting to work or in your downtime, this DIY solar charging setup will help to keep you connected and your devices charged.
.